I recently published my latest posting, a tome on making red wine. After a 5 month break the main reason for writing the post was to refresh my mind on winemaking as we approach the 2015 vintage.
I enjoyed writing the postings that made up a full year in the life of HHF. Some days I got so excited that it amounted to 2 postings in a day. My writing skills improved and the style changed. We now have a record in writing to which we can refer should we choose.
Writing daily journals comes at a cost. Compiling photographs, writing and editing are time consuming. To get everything done at the farm and maintain the writing meant getting up much earlier. Checking and rechecking the language, grammar and whether the post made sense resulted in reading the post up to 4 or 5 times.
So now I still get up early but the energy goes into the farm. There is still cheese making, wine, beer and cider making, More effort is going into improving the way we grow vegetables and fruits.
And if that wasn't enough there was a chance podcast that mentioned bread making by Josie Baker with just one little hint. That resulted in a huge leap in the quality of bread making at HHF and now after years of failure we produce fabulous pure sourdough with wholemeal stone ground Wheat and a pure 100% Rye with seeds. Gone are the bricks.
Then the coup de grace. Accidently came across a patisserie "Icky Sticky" in Lorn which made those traditional French pastries with Crème d'amande, Frangipane etc and topped with fresh fruit. Richard Bertinet's book Dough solved all the recipe problems and I'm having a ball turning out all sorts of great real cakes, tarts and biscuits. What is lovely about these traditional recipes and methods is that they get back to the basics of flour, eggs and butter. Honey has replaced sugar successfully. Once you get a feel for the techniques it is a simple matter to experiment with ingredients.
Can't say there won't be any more posts but at the moment living the lifestyle is consuming a lot of time. Writing was a great mental activity which can't be avoided forever.
Monday, December 22, 2014
Sunday, December 21, 2014
Making Good Wine: Fermentation Part Three (Red Wines)
If you are growing your own grapes the
decision to pick rests entirely with yourself. Naturally, weather and
ripeness feature in the decision making. At HHF this involves a
casual walk through the vineyard with a refractometer testing select
grapes from different locations. Experience says that the overall
impression of ripeness will be a degree or two higher than the true
end result. Why is not a mystery. Once the bunches are de-stemmed and
resting in a fermenter the sugar levels of ripe bunches are spread
across not so ripe bunches.
Other considerations are seed maturity
i.e. not green and not too brown, a taste test by crunching seeds in
the mouth give an indication. The skins should also feel a little
silky to touch giving an indication that ripeness is at its peak.
When buying and picking grapes from a
commercial vineyard timing is dictated by their activity. Usually
their winemaker makes a call and getting a share means fitting in
with them. You take what you are given.
A good way to encourage better quality
is to triage the bunches as they are picked. Getting rid of an rot,
shrivelled or green grapes and even any under ripe fruit. The tool of
choice is a pair of short nosed scissors. Their stubby length but
sharp pointy end allows easy gouging out of any unwanted berries. The
handles a rubbery lined making them comfortable to use for extended
periods.
Picking is best in early morning when
the fruit is cool. Crushing and de-stemming can commence immediately.
If the grapes have been transported from another vineyard the picking
bins will go into a refrigeration unit while the crush pad is setup
and any other chores are completed. There is a long day after picking
which involves a lot of cleaning once the grapes a crushed and de-stemmed. An important task is to weigh everything as this is the
basis for payment to the grower but is also the basis for future
calculations of sulphur, Acid and Oak additions.
As the fruit is loaded into the crusher
de-stemmer any good bunches are set aside to be added to the fermenter
as whole bunches which are placed at the bottom. The bunches chosen
are undamaged and don't have green stems nor dried brown stems. What
is required is mature stems which will add some additional tannin
complexity not green herbaceous flavours. The usual ratio is about
10% whole bunches but if it is a particularly ripe year more can be
added. A bit of a guess really. In a an under ripe year 0% may be the
choice.
Once crushed and de-stemming is finished
the resultant fruit and juice is placed under refrigeration for 1-3
days. 30 ppm Potassium Metabisulphite is added. Ideally the
cooling temperature should be about 7 C but using old freezers
results in the outer fruit freezing. Not a bad thing as the freezing
breaks down the skin cells helping release the colour.
This is a good time to drain off 10% of
the juice for Rose. Exactly when depends on how much colour is
wanted. Again a bit of a guess, but 24 hours is a good start.
Experience has shown that a little oak added after fermentation of
rose i.e. at the first racking adds a excellent flavour to the dryness.
Rose is ideally fermented at 20 C.
Reducing the juice by 10% means there
are more skins and less juice adding even more colour.
24 hours after crushing is a good time
to run some tests. Sugar levels should be what is expected. If not
here is the opportunity to add sugar in the form of plain white sugar.
pH should be in the 3.4 to 3.8 range. If it is above 3.8 then the
addition of Tartaric acid may be the solution. Ideally testing for
Total Acidity (TA) is better but that requires some more equipment
and chemicals. Something that most amateurs don't bother with but
then some do. I find pH is a reasonable indicator as to where acidity
lies. We invested in a pH meter rather than pH papers.
After the cold soak the fruit and juice
needs to warm up and the yeast re hydrated. By lowering the
temperature of the yeast gradually it is possible to add it to the
fermenter early. Usually that will be at about 20C.
Ideally the fermentation temperature
should reach and stay at 30 C but certainly don't let it go higher
than 32 C. Plunging of the cap of skins should be performed 3-4 times
each day. This helps add oxygen to the must and aids the yeast.
5-7 days of fermentation should be
followed with 10 days minimum although a total of 21-23 days from
Commencement of cold soak to pressing is ideal. Post fermentation is a
good time to cover the fermenter with plastic wrap and inject some
inert gas such as CO2. We use CO2 because we own a SodaStream which
has a conveniently sized spear pint over which a plastic tube can be
fitted. CO2 or other gas cylinders are expensive to buy and tedious
to rent for short periods.
Usually if the skins have completely
fallen from the surface it is a reasonable guide to press. Pressing
slowly is advantageous in reducing the amount of unpleasant flavours
that can be forced from seeds and stems. Always a good idea to keep
the pressings separate for later use in blending.
We use a fine sieve to reduce the
amount of solids being funnelled into the fermenter. The addition of
oak occurs at this stage in the form of chips. We found that 50%
French and 50% American to be ideal but no more than 6 grams per
litre in total and less if the wine is lighter.
If there is another batch of red still
fermenting the addition of skins from the just pressed batch will add
complexity.
Some people rack the wine 3-4 times before bottling. We found that racking once about 40 or so days after pressing was sufficient to get rid of the gross lees which might impart unpleasant flavours. It is at this time that a decision to add more oak can be accommodated. Ideally a little more sulphur helps, lets say the rest of the 50ppm that we try to stick with.
Bottling commences from 8 months after pressing. Using a Bio Dynamic calendar we choose the best week in each month when turbidity is at its minimum. With reds there will always be some sediment as they age but I'd rather have a bit of sediment and decant . Filtering to me seems to eliminate some of the goodness in the wine that makes it a healthy part of a meal.
That is the short version so any questions?
Thursday, July 31, 2014
Making Good Wine: Fermentation Part Two (White Wines)
The juice now separated from the skins, sulphured and rests for 24
hours in demijohns. The prior skin contact will evolve in the flavours of the finished wine.
At this time it is possible to clarify the juice by continuing to chill but choosing not to clarify leads to a richer wine.
Now is the time to perform some testing. Firstly sugar levels using either S.G. or as it is done at HHF a refractometer. Now that all the grapes are combined and everything standardised the reading is accurate. Whether sugar is to be added really depends on the grape variety. Some like Hunter Semillon will do fine at 18.5 Brix (alcohol level of 10.5%). As a general rule at HHF anything above 20 Brix is fine as long as the fruit is ripe. Although there is more comfort in 21.5 Brix. At that level the wine has some body and keeps well without too much sulphur.
The second test which adds value is the pH test using either pH papers which are cheap but not as easy as a meter, although the meter needs to have calibration checked when unused for a period. Various guides recommend a lower level of 3.0 and an upper level of 3.3 through to 3.5. A goal of 3.25 is ideal and adjust only with Tartaric acid. 3.5 is the absolute upper limit but with 3.25 much less sulphuring is required.
If it has been a dry or drought year then yeast nutrient is critical. But don't use a lot and only add it after one third of the way into the fermentation. add the last yeast nutrient at two thirds through the fermentation and none after that.
While the testing is going on a bit of juice has been taken and the sample container sits in a bowl of hot water to get the sample to 40 C at which point the yeast is added. When the yeast commences fermentation a little cold juice is added until the temperature drops by no more than 10 C. This is left until the fermentation fires up again and then more cold juice is added and so on until the temperature of the yeasted juice falls to within 10 C of the main batch of juice. It is then gently added. Now wait until the airlock begins bubbling, usually about 24 hours.
There is a school of thought that the airlock should now be removed and replaced with cotton wool to allow the gases to vent more easily, especially any off aromas.. At HHF both methods have been used with success. although an airlock is safer.
The demijohn must now be slowly cooled to between 10 and 15C. This is done by placing the vessel into a refrigerator with an adjustable thermostat. The cooler fermentation results in the production of more fruity esters.
Test the sugar levels of the wine every day to follow the falling levels. At the same time shake up or stir the sediments in the fermentation container. This will add a complexity to the final wine. When two thirds of the sugar has expired take the demijohn out of the cooling chamber and allow it to finish at a higher temperature but not more than 30 C, 27 C being ideal. This serves two purposes. Firstly, helps prevent a stuck fermentation and secondly, adds another dimension to the final wine. All these manipulations do really add complexity into the wine some of which may not be apparent until the wine has aged a few years.
At this two thirds point when the wine reaches the ambient temperature, usually about a day, it ideally should be racked into vessels with as little head space as possible to finish fermentation. At the end of fermentation allow 30-40 days for the sediment to settle and then rack into clean containers. Getting it off the gross lees is important to prevent the production of Hydrogen Sulphide from the dead yeast cells.
When racking off gross lees is also the best time to add oak chips. Anywhere from 0.5 to 4 grams/litre although 5 grams has shown a good result in Semillon. The amount of Oak really depends on the fruit ripeness. More ripeness handles more Oak. Don't use Oak on Sauvignon Blanc or Traminer as they have strong spicy aromatics of their own.
It can be racked again if desired although at HHF the least amount of handling has produced the best results. If lees really build up then a racking is a good idea but if there is only a fine film it is left alone.
Bottling is best done during the period leading up to no moon and ideally in the cool of mid to late Winter. The experience here is no sediment problems even after a number of years in bottle. Natural settling is far superior to fining or filtering.
Wednesday, July 30, 2014
What it means to have a small Holding
Here's the theory for July: It's cold
or at least cool, it could be misty in the morning and even drizzly
rain, the fireplace is ticking over with hot coals or a fresh piece
of wood flaring, a bit of a wind gusting outside and the sky is grey.
Time to spreadeagle on the lounge with a one of the many books
backlogged in the pile and relax.
Now here is the reality: The sun is
shining, the wind has gone for the moment, the grapes need pruning
and weeding, tomato varieties need selection and potting under heat
to be ready for a September planting, there is a pile of other fresh
pruning's that need a run through the mulcher and there will be a need
for lots of compost in spring so make use of all the green material
you have.
The book goes back on the pile and work
begins. All the grapes get pruned, a little layering or transplanting
of last year's cuttings to fill a spare spot. Tying up any rogue
shoots, a quick weed around the trunk and on goes a huge pile of cow
rejected silage which stinks but the wind is blowing that scent
across to the neighbours and away from us. Oh well, the smell will
only last a few weeks. It is just part of nature in the country.
Probably means moving a bottle or two of last vintage from our side
of the cellar to the neighbours side of the cellar.

July can really be one of the busiest
months of the year. At least in August it will only be the last week
when the Tomato bed needs building that life will become a little
hectic. Then of course with September becomes the planting out of the
warm month vegetables. Always too many for two but there are always many
happy recipients elsewhere in the village. There is the anticipation
of the first fresh tomato and first young cucumber. Yes it is
possible to use a hothouse and grow the most delicious produce all year round
but then the mouth watering wait and abstinence is missing and life
lacks those peaks and troughs that provide contrast and highs of long awaited pleasure. |
| Table grapes pruned |
 |
| Ready for chipping and mulching |
 |
| A lot of work and tons of silage but will pay dividends |
 |
| Using the freshly made compost to start seedlings |
As the weather warms up and if the
rains come the following 6 months become a blur of weeding, watering,
planting and harvesting until the blessed cool arrives with a sigh of
relief tools go down and relation comes in the form of wine and
cheese in the mildly warm garden.
The steady rhythm of seasonal demands
and rewards. With each bringing the expectation and desire of the
next stage. Maybe some find this repetitiveness boring. But there is
a pleasure which can't be felt from any other form of activity.
Contact with the soil, plants and animals seems to be a desire that
comes from deep inside.
For some it's the travel, the sport,
the toys for us it's being at home on our own plot, digging and
weeding, having successes and having failures, plopping down in the
evening with fresh home made produce and resting for tomorrow.
Tuesday, July 29, 2014
Mushroom Growing Experiment - Update
This is the end of July and the experiment started mid May. There is some progress.
The process for Oyster Mushrooms works i.e. break up an Oyster Mushroom into some used coffee grounds obtained from your espresso machine or from the local coffee shop. Fresh grounds only as they will go mouldy after a few days. Keep the container warm (21 to 26 C) and moist (85%+) and within a few days or so some white threads appear. Boil some straw to sterilise and when cool mix in the coffee grounds. Wrap tightly in a plastic bag so it stays moist and continue to keep warm and moist. This can take 2-3 months. When the mushroom stems appear inside the plastic bag cut lots of small holes (20 cent coin size) in the bag for the shoots to pop out.
The only thing that we did wrong was cut the holes too early which allowed the straw (or in our case hay) to partially dry. It has received another soaking and now the waiting begins. Will the mushrooms shoot from the holes?
To keep the small hothouse warm at the correct temperature there are three lights. To keep the humidity up there is a 9 litre bucket with a small aquarium pump splashing water and it needs topping up daily. Running these must be consuming a lot of electricity compared to the potential yield of mushrooms. Either the volume will need to be ramped up, growing restricted to Spring and Autumn or it will be cheaper to buy mushrooms.
This process works for Oyster Mushrooms. The same process was used (optimistically) on several other mushroom varieties (just to fill the hothouse) with no success which means there is some more research to take place to understand their particular needs.
There are kits available from Bunnings and occasionally from Big W but at $20 there needs to be a harvest much greater than 2 kilograms to justify their acquisition. We have never ever been skilled enough to get more than a few individual mushrooms from a kit. Now that the hothouse is in operation this may change the situation and may be worth a trial.
I suppose the question to answer is whether it is possible to maintain a steady flow and not flood of mushrooms (with or without kits) such as is done in the garden with succession planting. Doing it seasonally and keeping running costs very low may make it a viable operation. Doing it without kits would make it an inexpensive exercise. Much like a vegetable garden there is still a lot to learn in order to get to a set and forget operation.
 |
| Success |
 |
| And more success |
The process for Oyster Mushrooms works i.e. break up an Oyster Mushroom into some used coffee grounds obtained from your espresso machine or from the local coffee shop. Fresh grounds only as they will go mouldy after a few days. Keep the container warm (21 to 26 C) and moist (85%+) and within a few days or so some white threads appear. Boil some straw to sterilise and when cool mix in the coffee grounds. Wrap tightly in a plastic bag so it stays moist and continue to keep warm and moist. This can take 2-3 months. When the mushroom stems appear inside the plastic bag cut lots of small holes (20 cent coin size) in the bag for the shoots to pop out.
The only thing that we did wrong was cut the holes too early which allowed the straw (or in our case hay) to partially dry. It has received another soaking and now the waiting begins. Will the mushrooms shoot from the holes?
To keep the small hothouse warm at the correct temperature there are three lights. To keep the humidity up there is a 9 litre bucket with a small aquarium pump splashing water and it needs topping up daily. Running these must be consuming a lot of electricity compared to the potential yield of mushrooms. Either the volume will need to be ramped up, growing restricted to Spring and Autumn or it will be cheaper to buy mushrooms.
This process works for Oyster Mushrooms. The same process was used (optimistically) on several other mushroom varieties (just to fill the hothouse) with no success which means there is some more research to take place to understand their particular needs.
There are kits available from Bunnings and occasionally from Big W but at $20 there needs to be a harvest much greater than 2 kilograms to justify their acquisition. We have never ever been skilled enough to get more than a few individual mushrooms from a kit. Now that the hothouse is in operation this may change the situation and may be worth a trial.
I suppose the question to answer is whether it is possible to maintain a steady flow and not flood of mushrooms (with or without kits) such as is done in the garden with succession planting. Doing it seasonally and keeping running costs very low may make it a viable operation. Doing it without kits would make it an inexpensive exercise. Much like a vegetable garden there is still a lot to learn in order to get to a set and forget operation.
Monday, July 28, 2014
Home Kill Beef - Cured Beef Results
In a previous post on Cured Meats 6 different recipes were attempted. Three of those were tested this week as they appeared to be ready.
The River Cottage Pastrami was excellent with large crunchy pieces of herbs and spices still attached to the exterior. The only variation to the recipe was the exclusion of two steps. The cold smoking was bypassed as Jean felt that it may introduce unnecessary carcinogens into her diet. Since she is the only meat eater in the family that seemed a fair request. Also skipped was the simmering in salted water. The meat was dry cured sufficiently that it didn't need any cooking. Taste wise it was excellent with good herbal flavours and textures and not excessively salty.

The River Cottage Biltong was also excellent, not too dry and chewy. And when sliced thinly melted in the mouth.

The Leith's Meat Bible's Bresaola was also quite good but a little over salty. The fault here may have been not adjusting the salt volume to the meat weight. The piece of beef used was quite thick and the central part was still well coloured. The feeling was that a good rinse with water to remove some excess salt and hanging for another month would provide a more well rounded flavour.

Once the samples had been shaved off and tasted the next step was to thinly slice, vacuum pack and freeze. There was far too much meat for one person to consume in just a few weeks. After some investigation it was clear that the cheapest vacuum packers can be of dubious quality. The other conclusion was that purchasing a vacuum packer made little sense if it was not used frequently.
The vacuum packer was easy to borrow as the boss at our work property had purchased a good quality unit a couple of years previously. We did purchase replacement bags with the conclusion that this is an expensive way to store food. The positive side was that the bags can be cleaned and reused although a little bit shorter each time once the seal was cut off. The cost of borrowing was a few sample packs.
The electric meat slicer was more of an issue. It is something that is not used frequently. There are cheap ones available but being unsure of how well they performed we preferred to borrow one to test the quality. Extensive communication with friends yielded no result and then by chance we came across a former work colleague who had a very old, high quality, restored Hobart commercial slicer. And what a gem it was. All three cured meats were sliced paper thin with ease.
The former work colleagues had become enamoured by meat curing and were heavily involved in making all forms of flavoured, air dried and smoked meats. This including constructing smoking and drying facilities with thermostatically controlled fans and burners. A pleasant couple of hours of slicing and cleaning was followed by lunch. We left with not only a pile of our own sliced and vacuum packed meat but also various samples of their sausages. A pleasant way to spend half a day.

As an aside these people also had an new Aldi slicer which they were about to throw out as it was completely useless for cutting cured meats. Just too flimsy for these drier cuts leaving a ragged edge and not robust enough to produce consistent thin cuts. So it seems size and quality do make a difference in certain areas.
In another month or so the remaining three larger cuts of meat using three other recipes will be due for testing.

The River Cottage Pastrami was excellent with large crunchy pieces of herbs and spices still attached to the exterior. The only variation to the recipe was the exclusion of two steps. The cold smoking was bypassed as Jean felt that it may introduce unnecessary carcinogens into her diet. Since she is the only meat eater in the family that seemed a fair request. Also skipped was the simmering in salted water. The meat was dry cured sufficiently that it didn't need any cooking. Taste wise it was excellent with good herbal flavours and textures and not excessively salty.
The River Cottage Biltong was also excellent, not too dry and chewy. And when sliced thinly melted in the mouth.
The Leith's Meat Bible's Bresaola was also quite good but a little over salty. The fault here may have been not adjusting the salt volume to the meat weight. The piece of beef used was quite thick and the central part was still well coloured. The feeling was that a good rinse with water to remove some excess salt and hanging for another month would provide a more well rounded flavour.
Once the samples had been shaved off and tasted the next step was to thinly slice, vacuum pack and freeze. There was far too much meat for one person to consume in just a few weeks. After some investigation it was clear that the cheapest vacuum packers can be of dubious quality. The other conclusion was that purchasing a vacuum packer made little sense if it was not used frequently.
The vacuum packer was easy to borrow as the boss at our work property had purchased a good quality unit a couple of years previously. We did purchase replacement bags with the conclusion that this is an expensive way to store food. The positive side was that the bags can be cleaned and reused although a little bit shorter each time once the seal was cut off. The cost of borrowing was a few sample packs.
The electric meat slicer was more of an issue. It is something that is not used frequently. There are cheap ones available but being unsure of how well they performed we preferred to borrow one to test the quality. Extensive communication with friends yielded no result and then by chance we came across a former work colleague who had a very old, high quality, restored Hobart commercial slicer. And what a gem it was. All three cured meats were sliced paper thin with ease.
The former work colleagues had become enamoured by meat curing and were heavily involved in making all forms of flavoured, air dried and smoked meats. This including constructing smoking and drying facilities with thermostatically controlled fans and burners. A pleasant couple of hours of slicing and cleaning was followed by lunch. We left with not only a pile of our own sliced and vacuum packed meat but also various samples of their sausages. A pleasant way to spend half a day.
As an aside these people also had an new Aldi slicer which they were about to throw out as it was completely useless for cutting cured meats. Just too flimsy for these drier cuts leaving a ragged edge and not robust enough to produce consistent thin cuts. So it seems size and quality do make a difference in certain areas.
In another month or so the remaining three larger cuts of meat using three other recipes will be due for testing.
Sunday, July 27, 2014
Blog Posting
It's been almost 2 weeks since the last blog post. A significant break after more than 12 months of publishing a post every day. Why? Just ran out of steam. There was lots to do outside and allocating writing time became secondary.
Normally, the blog would be written and edited over breakfast coffee but this takes a couple of hours. As well as reading and correcting several times, the preview feature is used right at the end to read and edit one final time. Something about seeing the post in the form it will be published that forces a better editing to transpire. The preview always picks up a few errors in wording or forces a grammatical change. Not to say it is perfect every time because time constraints push to end the screen time.
The goal to publish daily came about after reading/hearing an article on writing to deadlines. Journalists hone their writing skills via endless articles written to a short deadline. That was an encouragement to write as often as possible in an endeavour to improve skills. They have the benefit of an editor who corrects and modifies or chooses not to publish but the name of the game is quantity. The more articles written the greater the improvement in quality is the theory. The shorter the deadline the more natural the writing style and so on.
Well there is no independent editor to scan the articles, offer criticism, add improvements or drop the result into the trash can. So improvement remains unmeasured. There hasn't been a back tracking to review earlier writing to compare style changes but that seems like a good task to schedule, just not this morning.
The break in writing has resulted in a backlog of updates.
- The meat curing project produced some great information and results
- There is an update on the long long task of growing mushrooms with some success.
- The recycling of failed silage has continued unabated with actual tons used to both make composts and mulch nearly 200 metres of wine grapes.
- The series on winemaking still has a long way to go. It became a bigger task than first envisaged but a wonderful way to review all that has been learnt about wine taking. The challenge has been to put the information into logical and easily understandable sequence.
Wednesday, July 16, 2014
Making Good Wine: Fermentation Part One (White Wines)
Once the grapes arrive at the Cave there is one simple step. The picking container is placed in a cooling device. In this case a salvaged freezer or refrigerator and the grapes chilled. This takes the pressure off and provides time to record information in the vintage book, clean any equipment that has been used and have a meal and/or cup of hot liquid and plan the next step.
White Wine
The initial step with Whites is the destemming process. Just a quick run through the crusher/destemmer and into the refrigeration unit for 16 to 20 hours of cold soaking. This seems to be the optimum time to obtain some of the flavour from the skins to enhance the final wine. Various makers try various levels of skin contact to obtain different results. An individual choice based on experience, type of fruit and the end result being targeted. Grapes with a higher sugar level will cope with more skin contact. Some makers go for 36 hours to produce long aging wine.
One variant is to not de-stem but press as whole bunches being careful to press gently so as not to break the stems. This leads to a clear juice with the lowest possible phenol levels and produces a wine that is finely flavoured and structured.
After cold soaking Potassium Metabisulphite can be added to reduce the risk of oxidisation and infection by unwanted yeasts and bacteria. Fruit quality dictates the level of sulphuring. With good quality fruit as little as 25 part per million (ppm) will work. With damaged fruit 50 ppm is safer. It should be noted that some producers add sulphur at the crush for extra safety.
It is possible to make white wine without preservative but it requires very special handling and specialised equipment to exclude any risk of oxidisation.
It can also be made without the special equipment by relying on Acidity, Alcohol and Tannins to protect the juice. The end result is best called a red drinkers white wine. It ages well but doesn't exhibit those fresh and gentle notes of a delicate white wine. But it is preservative free.
Pressing should always be performed slowly and gently. Just a light pressure over a long time. Using finger tip pressure is a good guide. This allows the pulp to settle into the gaps and the juice to escape. It also reduces the opportunity for the skins to tear and release unwanted phenols. This is where patience is required.
At HHF pressed juice goes straight into glass demijohns as a precursor to fermentation. Cotton wool is used in the neck of the demijohn. The demijohns are kept under refrigeration at 10 C.
Once the wine is sulphured and pressed it should be rested for 24 hours to allow the sulphur to perform its function.
Next: Making Good Wine: Fermentation Part Two (White Wines)
Tuesday, July 15, 2014
Making Good Wine: The Harvest
In this part of the world harvest or Vintage as it is named predominately occurs after December. There are some varieties which ripen earlier or are picked earlier because the natural acidity is needed for making sparkling wine. But lets stick with ordinary still wine making and in particular the Chambourcin in HHF's vineyard. The harvest of other varieties made at HHF is almost entirely controlled by the vineyards where we source those. We pick when they pick to co-ordinate with their pickers or machines.
Deciding on a picking date centres around the degree of ripeness. This involves wandering around the vineyard selecting individual grapes from different locations and different positions on the bunch. These berries are squeezed onto a refractometer to measure the sugar content. An alternative is to collect all the berries and squash them together to get an average. In a small vineyard there just isn't enough bunches to spare to collect whole bunches and perform a more thorough Specific Gravity test. Experience over a number of years has proven that the refractometer test is always at least 1 degrees higher than reality. This is kept in mind when weighing up picking times.
The thing about nature is that it is never even. The grapes from the eastern side are usually not as ripe as the western side. The grapes higher up the slope are riper than the grapes in the hollow. A nearby tar road radiates heat to ripen the bunches on that side. Every little variation in soil, aspect and influencing structure modifies the rate of maturity. And there is no way of knowing, until after harvest, of how many vines were influenced by any one variation. It is all a rough guess and experience.
The second test for ripeness is the taste test. This is a good test for overall flavour i.e. skin ripeness. The good wine makers base their decisions as much on this as any thing else.
The other useful test of maturity is the grape seed. Brown indicates ripeness, green says it's probably too early.
Acidity reduces as sugar levels increase. In ideal ripening years the two come together in perfect balance but this is a rare phenomenon. Although it's wonderful to have the balance naturally, insufficient acidity and high pH can be handled after harvest without making the end product suffer.
At HHF picking is based on when the fruit has truly ripened i.e. the seeds have started browning. This seems to be about the best indication that nature's work is at an end.
Weather sometimes dictates activity as well. If the grapes are close to ripeness and the weather report says 90% chance 150 mm of rain in the next week there are only a couple of options. Take a chance, harvest or place a bet each way and harvest 50% as a precaution. It really depends on how important it is to have some wine as opposed to possibly none. Sometimes it is better to go without rather than make an inferior product.
Picking is best done in the early morning cool. The grapes are cold and less likely to commence premature fermentation with wild yeasts. It is also more pleasant picking in the coolness of the morning than the middle of the day.
Even for the amateur weighing the harvest is important as it allows calculations to be easily performed in advance for things such fermentation vessel size, finishing vessel size, calculations for Potassium Metabisulphite etc. It is a short step from Kilograms to litres. In the HHF Vintage book the yield of liquid in litres is recorded against every wine. These yields are amazingly consistent. They vary a little in dry years. On average the yields are close to 60% at pressing time.
Our preferred picking container is an upright 100 litre plastic drum because it keeps the mouth of the drum close to the bunches for cutting and dropping and it facilitates moving the container without having to bend over.
The best implement is a small pair of scissors with a plastic handle to prevent blisters. It is light and requires minimum pressure to severe the stem. The short pointy cutting blades make it easy to position the blades for cutting.
One of the most important tasks is not speed but quality. Each bunch is examined and any bad fruit removed. Bad fruit being dry rock hard berries, bird picked berries, rotten berries and green unripe berries. Shrivelled raisin like berries are fine. And absolutely no leaves in the bin.
Chambourcin fruit is easy to pick with its long stem and large bunches. Some varieties such as Malbec, Chardonnay and Traminer are really hard work with small secreted stems and tiny bunches. But then not all aspects of wine making are joyous activities.
Next: Making Good Wine: Fermentation Part One
Monday, July 14, 2014
Making Good Wine: The Vineyard Part Two
The important part was the choice of grape. Chambourcin was a hybrid which we knew from the Cassegrain experiments at Port Macquarie could cope with humidity and still produce good red wine. The purchase was on rootstock although any that failed to thrive were replaced with non-rootstock and did well though never as well as rootstock vines. It's just that vigorous rootstock that handles the harsh conditions better. Without the choice of a hybrid it would have been very difficult to maintain a healthy vine without a lot of work protecting against mildew. This was a choice based around keeping the work load to a minimum and avoiding dangerous chemicals.
Feeding grape vines is a similarly tricky operation. Ideally the vines should drop there roots 3 to 4 metres into the ground pulling on the base minerals and transforming them to the unique flavours found in great wines. Seeing as how at HHF the roots go down such a short way (600 mm) before heading off horizontally it becomes a little more interesting. Many viticulturists have limited the amount of feeding so as not to create too much vigour and unbalance the grape flavour. The use of small amounts of cow, sheep or horse manure between the rows is common.
At HHF our soils are acidic and an occasional application of Lime or Dolomite is conducted after harvest every couple of years. Last year some Power Fish a concentrated fish emulsion was applied in a very dilute form via the irrigation system. Two applications were performed. The first as bud burst commenced and the second during flowering. This small intervention seems to have produced an excellent result without over stimulating the vines. The fish emulsion provided some trace elements in minute forms. There is a belief that over stimulating vines with nitrogen will only attract pests to lush growth. Everything moderation is a good guide whether it be lime, trace elements or compost.
Our chickens roam freely in the vineyard and harvest insects as well as leave behind droppings which feed the soil. This seems sufficient to encourage the vines to battle onwards.
Pruning is tailored to variety, conditions, tradition and vine vigour. In the case of HHF the goal is to minimise potential bunches to allow the struggling vines to produce ripe bunches by harvest time. Spur pruning is our choice although the occasional cane pruning occurs on some vines. At flowering time Chambourcin puts out three flower bunches per spur this would result in far too many bunches for the canopy and trunk to ripen. During flowering a regular morning task is to stroll through the vines pinching out all the flowers clusters except the closet to the vine. This reduces the crop by two thirds. Since undertaking this procedure our crops have reached maturity with good sugar levels and excellent skin pigmentation. It is possible to trim green bunches later but it seems pointless to allow a vine to make such a huge commitment of energy when it can be done at a much earlier stage. It does mean our yields have reduced appropriately but quality is beats quantity anytime.
Many vineyards spend time clear cultivating between rows to remove grass competition. This practice is waning and there is a greater movement towards grassed rows, green manure crops that are tilled under or better still legumes which are mown. Bare dirt looks fine until it rains and farm equipment gouges tracks between the rows. This happens so often during harvest leaving a terrible mess of compacted soil. There has been a bit of a trend to use horse drawn equipment in a few vineyards to reduce soil compression but it would be a rarity.
Birds are a pain in the butt once veraison (colour change in the grapes) has commenced. The use of gas cannons is effective in larger vineyards, Hawks are useful and there are sound recordings of predator birds which can be played on loudspeakers. As much as it is hated, netting is the choice at HHF based on cost. It does cause some vine damage. it reduces sunlight and doesn't help during humid days but it works. As soon as bird activity is noted the nets are spread out. This can sometimes be quite late depending on the bird activity in that year. White netting allows the most UV light. Biodynamic peppers have been experimented with and seem to have some success but rain dissipates the effect quickly.
Next: Making Good Wine: The Harvest
Sunday, July 13, 2014
Repairing the Garden Pressure System
It started with the garden pressure pump not cutting in when a tap was used. The controller is mechanical and as with mechanical things it had worn out. Perseverance was a waste of time as nothing would make it work consistently other that the occasional boot. The new controller was acquired and installed easily and the cut in and cut out pressures duly adjusted.
The next problem was that the pump would cut in and out every few minutes. Since there are three independent lines connected all three were turned off and the pump came to pressure and stayed there. That means the problem is in one of the three lines. Turned on line 1. No issues. Turned on line 2. No issues. Tried to turn on line 3 but the gate valve failed. Now that line is permanently off.
No spare gate valves but plenty of spare ball valves. All fine except the ball valves are a different dimension and need adapters which are not on hand. Fine, put up with the inconvenience for a few days until in Raymond Terrace next and collect some more adaptors.
Thinking ahead the decision is to replace the two remaining gate valves as the third was replaced last month, this indicates they are all of an age that could mean imminent failure.. Adapters acquired and two remaining gate valves replaced.
Not so good as both ball valves have cracks and leak which is probably why they were thrown away for us to salvage from the Dungog Dump Shop. Undoing all the good work the working gate valve is reinstalled. The failed gate valve is taken apart and repaired and also reinstalled.
All is not well. Now there are steady leaks from the connectors. Take the whole thing apart again, wash and clean away any grit, apply nylon tape and reinstall. Now the leaks are isolated to another set of adapters. Take apart again. One washer missing in one connector and a distorted washer in the other. Replace both and reinstall. Still some minor leakage in one adapter. Fiddle about for a while and reduce it to a few drops and give up. Time to take a break, Had a gutful of poly pipe repairs.
Of course the original problem of one line leaking is still there. Despite walking the entire line and checking all outlets on that line no faults found.
Time to walk away from the problem for a while. Pump turned off unless needed. A workable if inconvenient solution.
That is how it is possible to waste and entire afternoon and a couple of hours the next morning. Sometimes the cosmos burdens rather than caresses.
Saturday, July 12, 2014
Making Good Wine: The Vineyard Part One
There are lots and lots of books on choosing a site, preparing the ground, trellis choices and spacing's etc. These comments relate to the vineyard at HHF and how it evolved and how over more than 15 years it came to produce excellent fruit using standard techniques, ideas gleaned from various sources and experiments and observation. Every vineyard site is unique and although there are standardised principles they will vary, sometimes just that little bit or even a lot. It is all to do with the influences of not only soils and climate but also the influences of the surrounding area and structures be they trees, hills, mountains and water features. Experimentation will translate into dividends in quality.
Working full time and pursuing a bucket load of interests simultaneously meant the vineyard didn't always receive top priority every year but it did get pruned and watered and gradually over time shortcomings were eliminated. Continuing pruning and training is the critical task. If not pruned each year it takes a long time to retrain.
When the site was chosen it was an outcome based on a couple of factors. The site was reasonably close to the house meaning it would likely get some attention. A factor that is always important for the small winemaker. The area was an end of the orchard that wasn't needed as all the fruit trees deemed important at the time were selected and allocated a spot. Being close to the house has really paid dividends allowing a regular inspection with ease.
A local contractor had been employed to deep rip along the contour. 'Deep' really wasn't that deep as the bedrock of shale like rock was only about 600 mm below the surface. The ripping pulled up a lot of rocks which were gradually collected and used as fill elsewhere on the property. In this part of the orchard the contour ran East to West providing a perfectly North facing Vineyard. Who could ask for more. In hindsight ripping both along the contour and counter contour would have been beneficial.
There was no guarantee that vines would survive in this harsh shallow soil and humid climate especially since there was a goal of not spraying chemicals. Consequently little money was invested in trellising. Because it was just experimental only Star pickets and pig mesh were used as they were surplus stock in the hayshed. Very primitive and rough reaching 1000 mm in height at best and sometimes lower. The guide books talked about short trunk height contributing to better grape maturity. By keeping the distances between roots and bunches short there was less travelling for nutrients. This is fine except at picking time when the slightly hunched back begins to hurt. This would be discovered during the first vintage. Vines were spaced at 900mm (3 ft) intervals. Apparently crowding is good. It stresses the vines forcing a better quality fruit.
After almost a decade of trialling, the trellis system was replaced and the vines retrained to a greater height with fruit at the 1200 level.. This alleviated the bad back problem (sometimes quality must be sacrificed for health). But more importantly the extra height and additional wires to hold the foliage above allowed greater air flow during humid times as well as exposing the fruit to more sunlight an important criteria for better grape quality.
Irrigation was installed but the original pipe size was a minimal 12 mm with drippers. The problem here is not enough pipe diameter to get solid pressure to all drippers resulting in a tedious program of adjustment to all 150 outlets each time the irrigation was used. Eventually this was replaced with 25 mm pipe and two entry points for the water. Now it is a simple 10 minute task to eye ball all 150 with little or no adjustment required. Many vineyards avoid watering which is a great idea if you have deep soil and good weather conditions early in the life of a vine to allow it to establish.
Watering is a necessary evil on this farm. The soil is shallow and the ground dries out quickly. If not watered the vines die. While they were establishing lots of water was applied but gradually the tap was restricted forcing roots deeper and wider. Now watering is strictly controlled especially approaching harvest so as not to dilute the sugars. This is a tricky operation. Too much water and the berries swell with water not sugar and the ratios of everything in the grape distort especially the flavours in the skins. Not enough water and the vine shuts down and fruit stops maturing.
Wood chip mulch around each vine was applied in one of the early years but the chickens soon disposed of them spreading the lot evenly over the entire vineyard.
So there you have it. Planning and preparation are critical but don't guarantee a perfect result. Individual site conditions influence everything involved and gradual modification and adaption is usually necessary.
Next: Making Good Wine: The Vineyard Part Two
This will look at on going vineyard management.
Thursday, July 10, 2014
Making Good Wine: Introduction
Feeling a bit inspired after tasting a few of our more recent attempts at making good, wine it seems appropriate to document some aspects of the process.
Wine making for us started back in the 1980's on our first farm "Mundroola". Back then it was the hippy in us that made all sorts of fruit, herb and vegetable wines. Some of these were an acquired taste and some made you feel as if you were "shot out of a cannon" (quote from The Good Life series). Then there was a bit of a break of a few years while we relocated and settled in, planting wine grapes and an orchard. Back into it, but this time with real grapes, floundering with off flavours and lack of success.
A wine maker dropping off a large purchase of his wine, tasted these failed efforts, asked about the processes and informed us as to the problem(s). Then some early minor successes followed by more success and yet more experimentation. Then a philosophy developed. It isn't possible to just make wine or food, there has to be a guiding brief, something to refer to when faced with challenges and choices.
Marcel Pagnol summed it best in Jean de Florette:
"Well, look: after having worked hard - I mean intellectual work - after meditating a long time and philosophising, I came to the irrefutable conclusion that the only possible happiness was to be a man of Nature. I need air, I need space to crystalize my thoughts. I am more interested in what is true, pure, free - in a word authentic, and I came here to be authentic... I want to live in communion with Nature. I want to eat the vegetables of my garden, the oil of my olive trees, to suck the eggs of my chickens, to get drunk on the wine of my vines, and as far as possible to eat the bread I make with my wheat."
There are many excellent books on vineyard management, grape cultivation and the technical side of converting grapes to wine. What there appears to be a shortage of, is information on the ethereal aspects of these processes. Sometimes the technical explanation, points to the execution of the more delicate operation but it is so obscured in scientific language, only the more experienced and highly trained practitioners are capable of discerning the step. For amateurs, the plainer language bears more fruit.
Reading mountains of books, magazines, web pages, blurbs on the back of bottles and sales brochures over many years results in the accumulation of pages of notes on aspects of making wine which don't seem to rate a mention in most technical books on the process. These notes stem, many times, from a phrase or sentence identifying a simple, minor step in the process which seems insignificant when on its own, yet plays an important part in the entirety.
For the most part, for us, these practices come from French winemakers especially those small timers who make a barrel or two or three in a tiny village. Some come from artisan winemakers in various parts of the world looking to return wine making from pure science to a pure craft. Because they are comments within a commentary, they often don't contain measurements such as percentages, litres or kilograms. And they aren't always quantified.
These are the statements such as:
"This year we added a higher portion of whole bunches because of the maturity of the fruit".
What that statement means, once investigated and the facts compiled, is that normally they add in about 10-20% whole bunches in an average year and sometimes none. But this year, the fruit ripened exceedingly well and they needed to add in 40% whole bunches to get more tannin from the stems to balance the wine.
When those comments are taken in mind and the textbooks re-examined, it is possible to equate the statement to facts in the texts. Looking at the chemical composition of grape bunches shows the stems as a source of some tannins. Adding too many produces a harsher flavour. You could avoid stems all together and add powdered tannin to taste (as many wineries do) but then this story is about staying as close as possible to the natural process.
Sometimes the concept behind the statement can't be traced to a hard number and it becomes a matter of trial and error and guesswork. It is valuable to remember that nature is complex and equating everything to a number is often impossible. It becomes a matter of gut feel, experience and faith.
This is about the romance of wine making. This is not about using the laboratory to manufacture a pleasant scent, colour and flavour. This is about working with nature and bending with nature to produce the best possible result which reflects the variations of that year. Every year is different and sometimes challenging. The goal is to have a palette of ideas and options which can used or left during the process of steering grapes towards wine.
The next set of notes will be:
Making Good Wine: The Vineyard
Wednesday, July 9, 2014
Silage: More Uses
It's no surprise that we have started to accumulate waste silage in quantities that beg for alternate uses.
Rather than leave piles of the waste silage around the farm across the river it is loaded on the ute and brought home. One compost bin has been compiled and another two are empty which will be filled gradually over the next few weeks.
But there is still more than can be used in the current compost bins. Then an idea struck. Why not use some of it to mulch around the grape vines and then when this is done ditto for the fruit trees. And so a few ute loads have now been dumped in the vineyard.
There are now multiple parallel projects in progress. A NZ compost has been started using silage and fresh cow manure already collected. The green matter is coming from the vineyard. By mowing up and down the rows with a catcher green matter is collected and the ground prepared for mulching. Just before piling on the silage mulch there will be a bit of weeding and weed trimming around the vines.
Life is a bit hectic keeping up with the tasks but it seems a real waste not to take advantage of this rare opportunity.
 |
| Another Compost in Progress with Bill watching |
Rather than leave piles of the waste silage around the farm across the river it is loaded on the ute and brought home. One compost bin has been compiled and another two are empty which will be filled gradually over the next few weeks.
 |
| This pile looks small but it is close to a ton of rejected silage collected last night |
But there is still more than can be used in the current compost bins. Then an idea struck. Why not use some of it to mulch around the grape vines and then when this is done ditto for the fruit trees. And so a few ute loads have now been dumped in the vineyard.
 |
| One row of 12 done |
There are now multiple parallel projects in progress. A NZ compost has been started using silage and fresh cow manure already collected. The green matter is coming from the vineyard. By mowing up and down the rows with a catcher green matter is collected and the ground prepared for mulching. Just before piling on the silage mulch there will be a bit of weeding and weed trimming around the vines.
 |
| This mornings collection |
Life is a bit hectic keeping up with the tasks but it seems a real waste not to take advantage of this rare opportunity.
Tuesday, July 8, 2014
Potato Onions
These come under various other names but Google Images provides a good selection of views of these little gems. Our plantings have been sourced from different suppliers and vary in colour from Red to Gold and Brown. They all have one thing in common. They keep incredibly well. We were harvesting last years crop while still eating the previous year's harvest. And they are very strong flavoured.

The Garden diary tells us to plant these in July which we do religiously and have almighty success. Like all Onions they need lots of compost and lots of water otherwise the risk is a bunch of midgets.
Three months ago a patch was set aside for these and planted with Oats as a green manure crop. Today this was chopped and forked in well with a little Blood and Bone and a good few handfuls of Dolomite.

The rest was easy. Stick them in the ground, water and weed.
The Garden diary tells us to plant these in July which we do religiously and have almighty success. Like all Onions they need lots of compost and lots of water otherwise the risk is a bunch of midgets.
Three months ago a patch was set aside for these and planted with Oats as a green manure crop. Today this was chopped and forked in well with a little Blood and Bone and a good few handfuls of Dolomite.
The rest was easy. Stick them in the ground, water and weed.
Monday, July 7, 2014
Silage - Handling Waste, Spoilage and Rejects
One of the problems with feeding out silage is the waste that results. If the quality is fantastic the girls will almost lick the feeder and the ground around the feeder as clean as a whistle. But generally they manage to drop bits around the feeder as they pull out their mouthful. Then they trample on the dropped product and if the ground is a bit wet it becomes a mess.
If it is poor quality they tend to be even more wasteful. So this is a good indicator of how well the silage was made.
In the past if the ground was a bit muddy the waste would be spread out in a light mulch to cover the bare dirt and some grass seed added helping the ground recover.
At the moment things are a bit dry and there is little ground damage. In addition this batch of silage is of variable quality and the waste in one particular case 90%. Rather than just leave it to rot down in a big pile it has been loaded on the ute and brought to HHF.
What you see in the photograph is just a portion of the waste from this past week. It is all that could fit on the ute in one load. Yet more to come.
So what to do with it all? I'm sure you can guess. More compost! The challenge will be to come up with innovative concoctions for the various layers needed to make a hot compost. This could mean a lot of hand mowing to get a balance of material.
If all the compost bins are filled, the backup plan is building a temporary compost bin using mulch hay bales. This could be a busy period at HHF. That is the problem when you don't wish to see all this wonderful plant food wasted.
If it is poor quality they tend to be even more wasteful. So this is a good indicator of how well the silage was made.
In the past if the ground was a bit muddy the waste would be spread out in a light mulch to cover the bare dirt and some grass seed added helping the ground recover.
At the moment things are a bit dry and there is little ground damage. In addition this batch of silage is of variable quality and the waste in one particular case 90%. Rather than just leave it to rot down in a big pile it has been loaded on the ute and brought to HHF.
What you see in the photograph is just a portion of the waste from this past week. It is all that could fit on the ute in one load. Yet more to come.
 |
| Wasted Silage |
So what to do with it all? I'm sure you can guess. More compost! The challenge will be to come up with innovative concoctions for the various layers needed to make a hot compost. This could mean a lot of hand mowing to get a balance of material.
If all the compost bins are filled, the backup plan is building a temporary compost bin using mulch hay bales. This could be a busy period at HHF. That is the problem when you don't wish to see all this wonderful plant food wasted.
Sunday, July 6, 2014
White Wine
The cooler temperatures in the evening provided a leaning towards a glass or red wine as opposed to white. Occasionally a beer as a precursor but unchilled just straight from the Cave, cool but not chilly cold. Refreshing fizz. Then this evening the palate felt like a white wine. Not chilled just (outside) room temperature at about that 17 degrees C. There is a cardboard box outside the back door with some sample wines from the cellar under the workshop. This saves a long walk in the cool evening.
The only white in the box was "Sem 001". The HHF coding system means this is a Semillon 2010 batch 01. This bottle didn't have a screw cap but a cork which indicates it is from the last dozen of this batch. Every wine bottled here on HHF has one dozen under cork for long term aging and the rest under Stelvin Seal i.e. screw cap.
First impression was positive. There was no sediment despite being bottled unfiltered. So much for the commentators who say that bottling by the moon cycle is rubbish and wines need filtering.
Decanted the 750ml into a 375ml and a 185 ml leaving a single glass to enjoy. The nose was good, another promising sign. The first sip was unbelievable. This was an excellent wine, full of flavour and mouth feel. A tiny hint of those characteristics of a Hunter Semillon with a few years of bottle age. This is the point where you feel pretty pleased with yourself. All those past failures and mediocre results fade and you think only happy positive thoughts. It is worth the effort you say to yourself.
The excitement pulled Jean out of the other room and she investigated the wine in my glass. Colour: sparklingly clear with a hint of yellow, Nose: strange (not her strong point). Taste: "Wow, this is in the Didier Dagueneau league" (even if he did only use Sauvignon Blanc). So that was the end of the 2010 Semillon - we split the bottle. Just as well the entrée this evening was oysters.
The Wine
Sometimes when we pick the vineyard manager lets us have the box ends from the reserve block. But since this wasn't recorded in the vintage book we will never know if this was a factor.
Definitely, the lack of filtering adds more character. This is apparent in all the wines at HHF.
The Baume was 11.2 giving an alcohol level of 11.7. A bit higher than the usual 10.5 recommended for Hunter aged Semillons.
The pH was 3.24 which is about perfect.
The grapes after picking were chilled on skins for 18 hours then pressed and the temperature raised for yeast inoculation. New World Strain Chardonnay Yeast was used. Once the must had commenced fermenting the temperature was lowered and remained between 10 and 15 C for 6 days until the only a third of the sugar was present. Every day the must was stirred to add a little oxygen for the yeast and to circulate the sediment. An obscure practice of some French winemakers.
The wine was racked and 5 grams/litre of French Medium Toast Oak chips added. A little higher than the book recommends but then it did have a fair bit of skin contact.
And there it sat for 6 months until bottling. Occasionally tasted and now after 4 years it has blossomed.
Inspired again for another vintage.
Saturday, July 5, 2014
Some days can become unproductive
Some days are just that little bit different than others. Woke up at 2.30 am and couldn't go back to sleep.
An option was to lay there and hope that sleep would follow sometime. That's fine except when sleep finally arrives it's probably going to be 5 or 6 am and the plan was to get away early to get a little shopping done, pick up books at the library and a spare part for the garden pressure system which is misbehaving. Before leaving there were the cattle to feed, some yogurt to start draining, the curing beef needed its morning turning and attention and there was also some bills to pay. Some of these could be left until after our return but then you are running behind all day and feeling out of sorts.
The option elected was to hop out of bed, make a coffee, stoke the fire and get on with setting up the yogurt to drain, do all the work associated with the various meats under cure, write up all the cheques to settle outstanding accounts and relocate funds from one account to another, write the days blog, check and respond to emails, read a few blogs and news items and download a couple of podcasts. The Oats for our cattle are slow to sprout in the cold weather and despite 48 hours allowed for this phase the little white shoots are only just emerging. Brilliant idea is to move the bucket inside for the second 24 hours to near the fireplace.
By 6.30 am it's all done and feeling sleepy the head hits the pillow and Jean wakes me at 8 am. Feeling fine and knowing that a nap can be slipped into the agenda during the drive a shower refreshes and off we go.
All the jobs are done in Raymond Terrace which is amazingly quiet for a Saturday morning. It is assumed that school holidays have sent families elsewhere. From there it's a brief drive to Karuah with a nap on the way. The oysters are collected and a decision reached to have morning tea at the Greek restaurant just outside Karuah. This proves to be a good find. Home made biscuits and good coffee at reasonable prices and includes a pleasant chat to the owner.
Home leads to a second nap and then out to install the water pump on the dam that was sitting in the workshop repaired but unneeded until this lack of rain demanded some watering. While on a roll the pressure system is fixed and the ute unloaded, our cattle moved and watering commenced before its time to collect milk.
Over a home brew beer and Blue cheese the day seems to have been productive and deeply satisfying.
See what happens when you make good choices early in the day.
Friday, July 4, 2014
Cattle - Roaming Off the Property
No, not ours (this time).
Returning from an excursion to Dungog and travelling by the back route about 3 or 4 kilometres from home down in a sharp turning gulley stood a magnificent Black Braham Bull. Not old and age is hard to judge but lets say a 'youngin' probably just a yearling. Seemed nonplussed by our pause to examine.
This is where it's time to weigh up options. Keep driving and let someone else worry about the problem. Push it into the nearest paddock just to get it out of harm's way. Start looking for an owner and offer assistance.
When you think about it, what would you want someone to do with your strays?
Option three was about to become an adventure in sleuthing. Somewhere in the database of useless information laying dormant was a vague comment from someone years ago about a bloke called Stan Doftrees, who's property was within a 100 metres of where we sat, having some strange breed of cattle. Being a predominantly Bos Taurus region that could mean he has Bos Indicus and a home for this little bloke.
Up the drive and to the house for a bit of door banging before confronting a mature lady who admitted she was grandma and only visiting while Stan was away. Who's grandma was not divulged.
"There is a young Braham bull on the road nearby with a large Purple ear tag. Would that belong here?"
Never assume people know stuff so always provide two or more points of reference e.g. eartag colour.
"Oh dear I don't know if he has Brahimi cattle"
Now at this point you could correct the pronunciation but then what if Brahimi is a new cross breed of some obscure origin. Or she could also be referring to the chef of the same name. Best stay mum or grandmum in this case.
The problem is then shared with another current occupant of the house a generation younger. No relationship to grandma or Stan is provided but there is additional information is i.e. there is a Braham bull somewhere on the property but is grey. Which is an interesting comment as she refers to the colour of the good looking dark Grey Staffordshire slobbering on my foot as being Blue.
The upshot of all this is that there is still no home but a suspicion that it may belong here and if all else fails this will be the temporary home i.e. option 2.
Back down the driveway to try another neighbour and as luck has it 50 metres on Mary Widdow is exiting her driveway on route to another location.
"Braham cattle? no don't know anyone who would own that but I'm just popping down to see Farmer Gate. I'll call a few people from there".
As Mary Widdow puddles off down the road past the happily munching Brahmin we decide to try another nearby neighbour. Con Tractor knows everyone but he may not be home. Being correct about him not being home wasn't helpful and neither was his gardener.
Consensus that we try another neighbour in the other direction before executing option 2. As chance would have it Ma Gee who lives opposite Stan Doftrees is arriving home and is idling in the drive about to open her gate.
"No, don't know anyone with Brahmins".
Well this looks bad, at least two of the people spoken with have been in the area for a decade or more and should have a fair idea of who has what. Beginning to wonder how far this boy has strayed.
The neighbour next to Stan Doftrees is who we target next. Good fortune smiles and he is exiting his driveway with son in tow.
"Mary Widdow just called me to say there was a Brahmin steer on the road".
"No, not a steer, a bull"
"Oh OK then that belongs to Stan Doftrees. Give me a hand getting him into a paddock?"
And so it passed. Job done. But is this an indication that nowadays we don't take an interest in our neighbours? Surely not. I've always said that Bos Indicus become invisible in a region of Bos Taurus. That would be the only explanation.
Wednesday, July 2, 2014
Artichokes, Turmeric, Ginger, Horseradish and Frost
Many years ago when Artichokes were planted we had mixed results and gave up after a couple of years. Then two years ago inspiration arrived and a new idea tried i.e. planting them in large pots or recycled 200 litre drum halves. One of the other tricks to a good crop was planting out in July rather than the usual September. These combined ideas resulted in a huge success and the ideas was reused every year.
Today was the day for this task. All the spare drums were emptied and then each drum refilled with a mix of the old soil and fresh compost. This consumed the entire contents of one of the compost bins. No wonder there is always a fresh compost being built at HHF. The place absorbs compost in barrow loads.
There is a mix of Artichoke plants this year. There are some purple tinged ones grown from seed called Violette and a few plants divided from last years plants, also Violette which had produced offshoots. Jean's research also uncovered that the better variety for this climate was Green Globe. These were purchased a couple of weeks ago. Jean was careful to select pots that contained more than one seedling which resulted in paying for three and having 7 to plant.
With that task successfully completed it was onto another exciting anticipation. The harvesting of Turmeric. Having planted two pots this time there was a mass of juicy roots to collect. A very satisfactory yield.
Ginger doesn't grow as well (or the formula for success hasn't been employed - yet). Anyway the first yield was a bit low but better than previous years which was nil.
The Horseradish pot was up ended to find a harvest of zilch. There were a few decayed strands of root. It seems something went wrong. Not knowing the cause all that can be done is purchase another plant and start again. A disappointment as fresh Horseradish sauce is so good on smoked Salmon.
There was our first frost of the year. Just barely visible on the new compost bin but easily felt underfoot. You know that slightly crunchy but slippery feel as you walk.
And still there was time to sit with a cup of tea (no Scones, it's a fast day) and read a chapter or two from a current book with the Winter Sun warming our backs. This is the good life.
Today was the day for this task. All the spare drums were emptied and then each drum refilled with a mix of the old soil and fresh compost. This consumed the entire contents of one of the compost bins. No wonder there is always a fresh compost being built at HHF. The place absorbs compost in barrow loads.
There is a mix of Artichoke plants this year. There are some purple tinged ones grown from seed called Violette and a few plants divided from last years plants, also Violette which had produced offshoots. Jean's research also uncovered that the better variety for this climate was Green Globe. These were purchased a couple of weeks ago. Jean was careful to select pots that contained more than one seedling which resulted in paying for three and having 7 to plant.
 |
| Artichoke Pots |
 |
| Empty Again |
With that task successfully completed it was onto another exciting anticipation. The harvesting of Turmeric. Having planted two pots this time there was a mass of juicy roots to collect. A very satisfactory yield.
 |
| Turmeric |
 |
| Drying Harvest |
Ginger doesn't grow as well (or the formula for success hasn't been employed - yet). Anyway the first yield was a bit low but better than previous years which was nil.
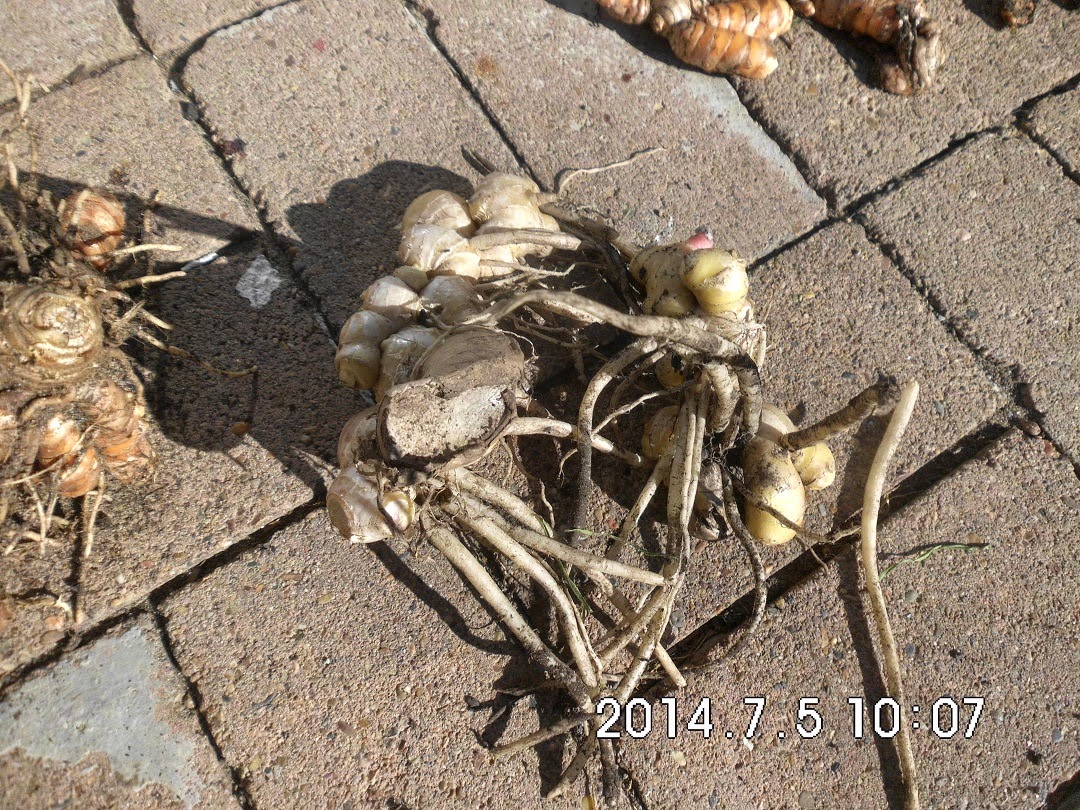 |
| Ginger |
The Horseradish pot was up ended to find a harvest of zilch. There were a few decayed strands of root. It seems something went wrong. Not knowing the cause all that can be done is purchase another plant and start again. A disappointment as fresh Horseradish sauce is so good on smoked Salmon.
There was our first frost of the year. Just barely visible on the new compost bin but easily felt underfoot. You know that slightly crunchy but slippery feel as you walk.
 |
| First Frost |
Making Compost - With Silage and Cow Manure
It can't be helped. The cows across the river pull out mouthfuls from the silage feeder and always drop a bit on the ground. By the time the feeder is empty there is a solid ring of spoilt silage around the feeder. What a waste, but no it came home on the ute. Some years ago at a farm clearing sale a handful of tools were acquired which include three pitchforks in need of repair which was completed. It is now in use and it really makes loading easier.

An empty compost bin is an evil temptation and coupled with a ute load of spoilt silage and many bags of fresh manure it was all too much. It had to be built.


Two ute loads later it was all done in a few hours. The fastest compost in the east. Only one iffy bit is the uncertainty if fermented grass will heat up again. But if not at least the compost worms will digest the manure and grass. Can't lose.

An empty compost bin is an evil temptation and coupled with a ute load of spoilt silage and many bags of fresh manure it was all too much. It had to be built.
Tuesday, July 1, 2014
Sawdust or Shavings for Chicken Run Mulch Part 2 Getting it Done
Yesterday there was the talk and today there was the action. Using a Gundaroo Tiller the compacted base of each run was loosened exposing worms and grubs and making the scratching a tad easier for the girls.
The next step was to spread the scoop of shavings about the run. As part of the process the chicken housing was cleaned and fresh shavings put into nests.
A few scoops of Dolomite were thrown around to sweeten the mix and finally a few bags of fresh cow manure added. This cow manure is impregnated with sprouted Oats which have not been digested by the cows. We started feeding sprouted Oats a few days ago and find the leftover seeds in the manure a real magnet for feathered creatures.
Finally, at feeding time that evening a few handfuls of chicken lollies were thrown about the run. Chicken lollies are whole Corn seeds.
Hopefully by the end of August the ingredients will be well mixed and broken down.
 |
| Loosening the compacted base |
 |
| Close up |
The next step was to spread the scoop of shavings about the run. As part of the process the chicken housing was cleaned and fresh shavings put into nests.
A few scoops of Dolomite were thrown around to sweeten the mix and finally a few bags of fresh cow manure added. This cow manure is impregnated with sprouted Oats which have not been digested by the cows. We started feeding sprouted Oats a few days ago and find the leftover seeds in the manure a real magnet for feathered creatures.
 |
| Sawdust and fresh cow manure |
 |
| The girls wasted no time in getting to work |
Finally, at feeding time that evening a few handfuls of chicken lollies were thrown about the run. Chicken lollies are whole Corn seeds.
Hopefully by the end of August the ingredients will be well mixed and broken down.
Monday, June 30, 2014
Sawdust or Shavings for Chicken Run Mulch
Last year after harvesting the chicken litter from the chicken run for use in growing Tomatoes we were in a quandary. What to use as bedding, having used the last of the sawdust. For a number of years sawdust had been used from a 15 cubic metre delivery. It kept the run dry in wet weather and over time became rich in nitrogen from the droppings but very slow to break down. It was time to try some alternatives.
The first ingredient was dried cow pats. Being a bit dry and hard it took months for these Pumpkin sized wads to break up and after some rain things got a bit mucky underfoot.
The next addition was dried out silage. Fine for a while but eventually it broke down and became mushy.
Jean reminded me the other day that it was a bit smelly in the run after the last lot of rain. Discussion resulted in a new plan. Rather than sawdust it would be wood shavings to see if the breaking down process would be any faster.

The shavings have arrived and are very fluffy and being so means 20 cubic metres of them is much less after compacting than sawdust. So be it. The other difference is the smell. These shavings have come from a joinery and are not the usual Eucalypt based material. It smells and feels like there are various timber sources which will make it interesting.
The proceeds of the chicken run are required at the end of August for the Tomato bed. This means that there can't be a lot of shavings incorporated into the run because there just isn't enough time for a bulk lot to break down.
What all this tells you is that despite having a proven set of techniques and standard routines which have worked over decades it is never too late to ignore common sense and experiment with the unknown.
The first ingredient was dried cow pats. Being a bit dry and hard it took months for these Pumpkin sized wads to break up and after some rain things got a bit mucky underfoot.
The next addition was dried out silage. Fine for a while but eventually it broke down and became mushy.
Jean reminded me the other day that it was a bit smelly in the run after the last lot of rain. Discussion resulted in a new plan. Rather than sawdust it would be wood shavings to see if the breaking down process would be any faster.
 |
| 20 cubic metres of shaving fluffiness requires covering against the wind |
The shavings have arrived and are very fluffy and being so means 20 cubic metres of them is much less after compacting than sawdust. So be it. The other difference is the smell. These shavings have come from a joinery and are not the usual Eucalypt based material. It smells and feels like there are various timber sources which will make it interesting.
The proceeds of the chicken run are required at the end of August for the Tomato bed. This means that there can't be a lot of shavings incorporated into the run because there just isn't enough time for a bulk lot to break down.
What all this tells you is that despite having a proven set of techniques and standard routines which have worked over decades it is never too late to ignore common sense and experiment with the unknown.
Subscribe to:
Posts (Atom)