Search This Blog

Saturday, May 31, 2014

Comfrey Bed for the Chickens

This was a simple little job. Some compost, an old fence post, chicken netting and a few bits of Comfrey.

The netting will stop the chickens scratching out the plants but as they grow the girls and boys will have access to fresh Comfrey leaves.


Building Another NZ Compost Bin(s) Part One Materials Sourcing

We have two wooden NZ Compost bins which have easily demountable front walls. Having two side by side allows us to make one compost and then 5 weeks later turn it easily and quickly into the second bin for the second heating process.

Because we make a lot of compost a third bin was made using concrete blocks. As it aged over the five weeks the compost material reduced in volume and the surplus blocks are used to assemble the second bin in advance of turning. There are some other projects in the pipeline where the concrete blocks are needed and in any spare time I've begun building a pair of bins out of hardwood.


The wood comes from two small chicken runs that we originally built nearly 20 years ago and have been gradually dismantling and wood stored. Over the last couple of days the dismantling has been finished and there is enough wood to complete the compost bins.

This is the third re-birthing for this hardwood as it all came from a Tennis Shed in Newcastle that was built back in the 1920s. In those days it wasn't unusual for large companies to build a Tennis Court and Shed for its management to use in the evenings and at weekends as a form of relaxation.

In the early 1990s the shed was dismantled to make way for a further car park expansion. The Tennis Court had disappeared a couple of years before to cater for the ever expanding car park. The Tennis shed had a few years reprieve as a document storage facility. I was working at the firm at that time and was lucky enough to have a chance to retrieve some of the timber before it was dumped. I remember bringing home several groaning trailer loads of this seasoned hardwood.

Our property has a number of completed projects which utilised the hardwood.

I'm always amazed when I see old buildings being demolished and the material being loaded into trucks by huge excavators to be taken to the dump and used as landfill. When I was growing up in Newcastle there were a number of recycling or demolition yards where all types of material was on offer. All these have closed. Just so disappointing.

Next: Building Another NZ Compost Bin(s) Part Two Material Preparation

Friday, May 30, 2014

A Quick Look at the Garden


Just ignore the dates on the photographs, the camera needs resetting.

This is just a random selection from the vegetable patches.

The Garlic is doing well. Some varieties took ages to sprout but now just about all the cloves are up out of the ground.

Although not pictured there are Carrots and Beetroot coming along but in need of a good weeding.

The Turmeric is dying back and will soon be ready for harvest. Looking forward to that as we love fresh Turmeric in our dishes.

The Sweet Potato is keeping us well fed. Finally the white variety has been weeded out and the only one that comes up automatically each year is the Yellow fleshed variety. All it needs each Spring is a good smattering of compost and a weed.

The Climbing Beans need pulling out and more Peas planted.

And the rest in pictures:

Broccoli, some that have been cut already are sprouting again

Broad Beans still a long way to go

Potatoes looking very good, hope it isn't all just foliage

Still getting the odd Zucchini

The everlasting Eggplant

Chinese Cabbage

One of the many many kinds of Radicchio

Silverbeet

Cabbage

Parsley

Green Manure crop in one of the few spare patches

Daikon Radish

Blood Sorrel

Chinese Veg

Rocket

One of the many Citrus

Surprisingly some late Grapes

Climbing Peas, not our strong point

We found this melon in the outside bed, some how overlooked but still edible

Bananas


A second crop of Pumpkins


The Pumpkin patch coming back strongly. It must the slow start to Winter. We hope this means these will keep well

Thursday, May 29, 2014

Chipper/Mulcher Finished

Fully Refurbished
Final assembly occurred today. Because the warning labels were ground off when cleaning away rust I've painted any danger areas in Red.

Part 2 Food Shopping: Value & Quality, Preparedness, Diversity, Nutrition & Health

Value and Quality
We don't automatically purchase the cheapest item in a category. Quality also forms a significant part of the equation when choosing food. How much sugar, how much salt and what other additions are made to place the product on the shelf. Anchovies in Extra Virgin Olive Oil are more expensive but better for you than those in Cotton Seed Oil. The most expensive brand is not always the best quality, often the price includes their marketing costs.

Country of origin plays a significant part in our decision making. Does that country have a reliable mechanism to prevent adulteration? What farming practices and reputation does a country maintain. Some countries are immediately suspect.

With seafood products we not only look at country of origin but also fishing method and sustainability of that species. Fresh seafood can be very expensive while frozen seafood can be quite cheap.

We also try to buy organic or Bio Dynamic wherever possible.

Preparedness
We keep an extensive pantry for a few reasons.
  • Preparedness means having sufficient stocks of food in the event of a disaster such as bushfires and floods.
  • Shopping on a monthly basis also means we need to stock extra. Some places like the wholesaler we only visit every few months.
  • Sometimes a store will carry an item we like or a new item we try and find terrific and then they don't have it again either at all or for months. For items that we frequently find out of stock we always stock a few extra.

Diversity
Our cooking is reasonably diverse, Asian, Indian, Italian,Greek, Spanish, French, Japanese and so on. Hence we keep a lot of herbs and spices and items which feature in specific countries cuisine.

We keep a number of frozen products such as Mussel Meat which comes in one kilogram packs at only $10. Frozen Whole Sardines are $10 in one kilo packs. Frozen Hoki fillets are less than $7/KG in 6.8 KG shatter packs. Smoked Salmon is a marvellous treat which is inexpensive if you buy the Trimmings. The dogs don't miss out as often you can pick up a few packs of Lamb offcuts for $4/KG.

At the wholesaler we buy most herbs and spices that we can't grow in large 400 gram containers. Coconut milk by the carton. Olive oil in 3 litre tins. Coffee beans by the kilogram.

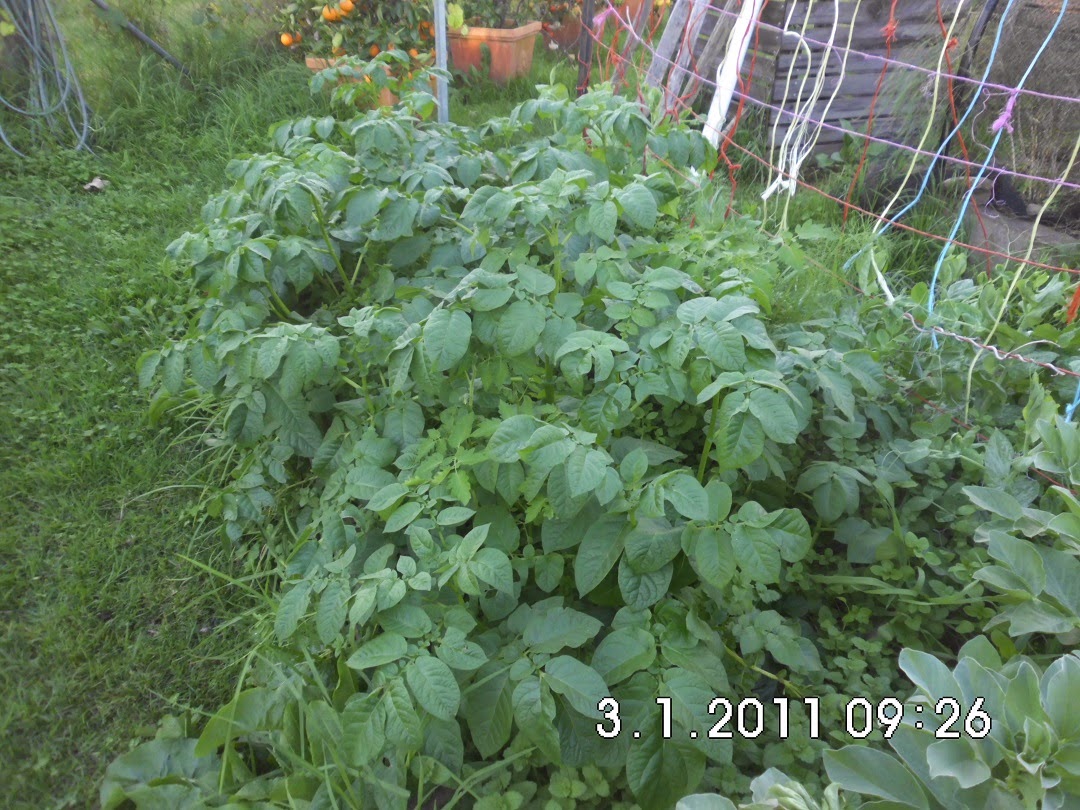
The same applies in the garden. we try to grow as many different vegetables and fruits as possible. Each have their own special advantage.

Nutrition & Health 
I read one blog that someone wrote where they only purchased items in the shops that were marked down thus saving bucket loads of money. The concept seemed fine on the surface until you saw what was being consumed. Packets of custard, sugared flavoured yogurt, pre packaged meals and the list goes on. An opportunity to save money now, ruin your health and spend bucket loads repairing the damaged body at a later stage in life.

We don't keep or eat any of those breakfast cereals such as Corn Flakes, All Bran, Special K etc. They carry far too much sugar and are expensive processed material when compared to the raw ingredients.

Food is medicine.

Variety and freshness are key to good health.

Remember Michael Pollan's advice "Eat food, not too much, mostly plants"

Probably the first two words are most important. "Eat food" means to eat real food -- vegetables, fruits, whole grains including fish and meat. Avoid what Pollan calls "edible food-like substances."
 
Pollan's Guidelines are: 
  • Don't eat anything your great grandmother wouldn't recognize as food. Those neat little packaged products that espouse healthy credentials yet have 15 unpronounceable  ingredients listed are not health providing.

  • Don't eat anything with more than five ingredients, or ingredients you can't pronounce.

  • Stay out of the middle of the supermarket; shop on the perimeter of the store. Real food tends to be on the outer edge of the store near the loading docks, where it can be replaced with fresh foods when it goes bad.

  •  Don't eat anything that won't eventually rot. There are exceptions such as Honey

  • It is not just what you eat but how you eat. "Always leave the table a little hungry," 

  •  Enjoy meals with the people you love at regular meal times .

  • Don't buy food where you buy your fuel.

Wednesday, May 28, 2014

Part 1 Food Shopping - Planning, Budgeting, Frequency

I was listening to Gavin and Kim Webber's podcast on budgeting and saving money and thought about our own experiences in Food shopping. Hence a few tips from our own experiences.

Planning is simple, in a kitchen drawer there is a piece of paper for each shop. When we use or open the last item of something we write it on the appropriate list. Everything is then ready to go. Not flying by the seat of our pants and no rushing about compiling a list as we try to race out the door. Those lists cover everything so that a shopping trip involvs everything including fuel collection, groceries, vehicle servicing, the lot. Less trips less fuel.
 
Deciding where to shop was not a haphazard exercise. We established which suppliers sold which products at the lowest price. We calculated everything at a per kilogram price (simple spread sheet). This then gave us the optimum size to buy as well as which supplier and brand. Once this price list is built it is easy to maintain as suppliers seem to stay consistent with the exception of the occasional special.

Budgeting was based on historical fact. We kept all our grocery shopping dockets for a few months and compiled a summary of each category - month by month. We then knew what we had spent and that became the maximum allowance. If we could spend less we did so as often as possible. In the following year's budget (we prepared a budget annually) we took the actuals of the prior year as the new budget. If grocery shopping was down the allowance was lowered accordingly.
 
We made allowances in the budget for all sorts of things, personal items, maintenance jobs and white goods replacement. But that didn't mean we spent the money. If it wasn't absolutely needed it wasn't spent.
 
Because our sole focus was on clearing the mortgage we were careful with every purchase. We made our own espresso coffee and took it with us on a day out finding a quiet park to enjoy the coffee and some home made cake.
 
Any money saved went towards mortgage reduction. Some of the most satisfying moments were seeing how much we hadn't spent at the end of each month.
 
When we finally paid off the mortgage there was this large amount of money appearing in our bank account that once used to go to the bank to pay off the debt. Now it sat there for us.

Frequency plays a significant part in saving money. We gradually, through circumstance initially and then by design went from weekly shopping to fortnightly to every three weeks and then monthly. We settled on monthly and continued that regime because we discovered we were spending less on groceries when we shopped monthly than when we shopped at any other interval. This saving remained consistent over the 5 years we maintained a detailed budget.

We couldn't put our finger on why exactly but the suspicion was that a number of factors came into play:

  • Firstly, the obvious one is there were 75% fewer opportunities to buy something on impulse.
  • Secondly, if we ran out of a much loved item in week 3 we did without and ate something else that was in the pantry.
  • Thirdly, we took advantage of bulk buying to cover the monthly interval and sometimes covering more than one month. Bulk buying not only means going to a wholesaler and buying a carton it also means taking advantage of the "buy 10 and get them at a discount" type offers that you often see with cat food (which we fed to the cats).
  • Fourthly, when shopping monthly there is less attraction in buying easily perishable products such as bread and instead buying flour and making your own. Baking your own bread is much cheaper. So in this we also mean getting back to the basics i.e. cooking using the basic ingredients rather than pre-processed products such as sauces.
  • Fifthly, we grew as much of our own food as possible. Vegetables, fruits and herbs. And avoided buying anything if we had a substitute product in the garden. Especially important was not to buy out of season items in the supermarket. This forced us to cook according to what was in season in our garden and to become creative. Taking the easy way out encourages laziness. After a while it really does become easy to walk through the garden collecting what is available and create a meal. It broadens the imagination and the palate and reduces the costs.
  • Finally, we never bought pre-cooked meals. No matter how hard we worked, how late we got home, how tired we felt. We always cooked our own food. And this is not hard to do. How often don't you know you will have a long day at least the day before. We just planned ahead and made extra of the meal that day before and had it ready to warm up. Sometimes we even had a meal in the freezer ready to warm and serve. Often we would remember to get it out of the freezer in the morning to defrost.
Next: Part 2 Food Shopping: Value & Quality, Preparedness, Diversity, Nutrition & Health


Tuesday, May 27, 2014

Repairing a Piston Pump

We have two Piston Pumps on our dam which are driven by small petrol engines. Two? you might say Why two?


Simple "Two is one, one is none". In the heat of Summer when everything is wilting and the crop of food is about to be lost the addition of a little water is useful. But the pump is broken! No problem use the backup pump.

The point of this blog is that one of the pumps, the oldest wasn't performing very well. Only a small amount of water was entering the holding tank at the top of the hill.

Piston pumps are a joy to work with as they have very few moving parts and as a result very little can go wrong that can't be fixed easily.

First up I checked the leather cups attached to the piston in the pumping chamber. Four bolts exposed the leathers and showed them to be in perfect condition.

The next assessment is a two stage, one bolt per stage examination. These are the two valves that allow water to enter the system but not return. One for the foot valve in the dam and one for the pipe running up the hill to the holding tank. Sometimes a pebble can be sucked in and hold one of the valve covers open. Both as clean as a whistle.

A mystery at this stage. Both pumps are started and while sitting there contemplating what to do I observe both pumps and see a problem. The faulty pump's piston arm does not move in and out anywhere near as far as the functioning pump. Workshop job.


Once at the workshop a little solvent and water is used to remove most of the oily debris before setting about dismantling. It doesn't take long to break it down into individual pieces. There are no rusted on bolts or other debilitating problems. Every bolt and nut is attached to cast iron or brass. Nothing rusted tight. You see why I love piston pumps.


Finally into the innards the problem is uncovered. A worn Gudgeon pin has finally come loose. We have a spare in stock. The two components that are held by the Gudgeon pin are also worn but the unit can be patched and put back in service until the other two parts can be ordered.


Now that the source of the problem is known the new parts can be installed while the pump is down at the dam. No need for a second disconnection and trip to the workshop.

It is good to do perform repairs in the workshop when they are major or the problem is unknown as all the tools are handy and there is the relaxation of a comfortable environment which encourages a thorough servicing.

Sunday, May 25, 2014

Mixing Bio Dynamic 500

Today was the day to spread BD 500.

The first stage is the mixing using our newly repaired stirring machine. A new motor had been installed and checked that it could rotate in one direction and then the other. Today it was filled with water and tested with a full load. And almost surprisingly it worked first time. The level of water in the mixer dictates how long it turns in one direction before stopping and changing direction.

Fresh Rainwater in the stirring machine

Note in the top right hand quadrant above there is a small green and brown projection into the water. This is the direction change mechanism.

The paddles creating the a vortex

The rotating water flicks a switch (the green/brown stick) into the direction of the moving water. This changes the polarity for the motor which will effect is rotating direction in the later step. Then as the outside edge of the water  rises it lifts a small float that turns off the power supply.


Chaos in the water as the stirring paddles change direction

The water continues to rotate and the vortex begins to drop in height. The on/off switch float drops low enough to turn on the power supply and the paddles begin to rotate in the opposite direction thanks to the green/brown polarity stick.

Because the water is still turning one way and the paddles in the opposite direction there is a lot of splashing creating a chaotic mess in the stirring machine. Effectively aerating the water.

Vortex forming once again

Eventually the water changes direction and a new vortex forms and the process is repeated. Forming the vortex and then the chaotic reversal takes about 30 seconds. The stirring process is timed for one hour and then an hour is allowed for distribution.

BD 500 is a preparation which is applied to the soil. The normal application process is to spray it out in large droplets. We walk around with 9 litre buckets and distribute it using a banister brush which provides the necessary droplet size.

This is a simplification of the process and there are many details omitted. The BD500 must stored in a particular manner. It should only be distributed under certain conditions and times. The materials used in stirring and spraying are from a limited choice of materials. And then of course there is the making of BD 500. Another long story.

Bio Dynamics is a large topic with many aspects and sometimes difficult to explain and understand.

Saturday, May 24, 2014

Chipper/Mulcher Repairs

Made a start on the repairs this afternoon. The original plan was to replace one of the main flail bearings. This particular bearing is located on the engine side and can only be reached by removing the engine first. Fortunately despite the initial concern about the size of the task it turned out very simple. There were only six mounting bolts all of which came off easily. Usually with a piece of machinery of this age rust causes all sorts of grief. But not today.

One Engine off

First up the Pulley was removed. Again good fortune struck and it slid off easily with the pulley remover. Just a note here. This pulley remover which belonged to my father has proven to be a most useful tool. It goes for months if not years without being taken off the shelf and then in the space of two weeks receives a regular outing.

Pulley and bearing remover


With the pulley off, then came the locking washer and the nut which holds the bearing in place. In actual fact although the nut is there to hold the bearing but the bearing is firmly on the shaft and is not in any risk of coming easily but when in operation I'm sure there is a lot of pressure.

The tricky thing about the bearing is that there is no room to insert the claws of the pulley remover. Yes, another use for this tool. The only way I found to remove the bearing was to grind away a section of bearing and use a cold chisel and hammer to shatter the casing.  This is one of those "no return" actions which must be chosen carefully. After a long examination I concluded that the bearing had not failed but was still in good condition. The real issue was the bearing retainer wobbly because the supporting bolts had loosened.


Pulley assembled

No need to perform any major surgery. Just a basic maintenance task after all. Retighten the bolts with some added split washers.

The next task was to sharpen the chipper blade.

Chipper chute
Chipper blade
Chipper blade sharpening jig
Sharpening the chipper blade was always a drama It was difficult to keep an even angled edge and the blade would get hot. It finally dawned on me that a simple jig would be easy to make. The jig made it easy to keep a constant angle and the wooden jig insulated my fingers from the heat.

While the machine is dismantled the followed will be done:
  • Grind a new edge on the flails
  • Clean the engine air filter
  • Clean and rust  proof any bare metal components on the body
  • Check all the other supporting bolts.

Vale Bossy Boots Yard Supervisor

Today was the passing of the much loved Bootsie.


Her full story is here.

Three months ago she suffered a series of strokes which initially left her partially disabled. However Jean spend time with her each day providing physiotherapy and ensuring she ate and drank. The physio worked and she made a remarkable recovery almost returning to her former self. Being a bird of enormous stoicism she never allowed herself to stop foraging or grooming.

As with high metabolism creatures the recovery was short lived and further strokes finally left her almost immobile. Jean cared for until the point where she stopped taking food. At that time it was up to me to ensure a pain free peaceful end.

We are continually reminded of her when we look out to the Orchard and see that almost all our poultry were raised by this magnificent fowl.

Bootsie, may you rest in peace with your many friends and family in the great henhouse in the sky.

We already miss you.

Thursday, May 22, 2014

Dentist

It started on Monday with a slight tenderness on the right side of the mouth. By Tuesday morning  a mouth that felt like the gum had been scratched or damaged. By night fall it was throbbing and eating a meal was becoming increasingly difficult and sleep that night was almost no existent. Not excruciating pain just annoying. Hardly worth the effort of taking a pain killer. But by 4 am a Paracetamol tablet helped.

I went to work across the river and did what needed to be done then headed home.

The big mistake was using the thumb and finger to grasp the tooth which seemed to be causing the problem and give it a little wriggle. The result was  intense and ongoing pain. The next Paracetamol seemed to take forever to take effect.

The regular dentist doesn't work Wednesdays or Thursdays and the best they could do was get a substitute for the next day. I pleaded a little harder. I wasn't going to last that long. They would check again and call back. The time was used listing out alternated providers, B, C and D just in case.

I've done some nasty things to my body in the past. Badly cut and bleeding parts of the body are patched and we're back in action. Nasty falls etc. barely have any effect. But a tooth brings the entire universe to a halt. What is it? Just the proximity to the brain? I would have thought with a bloke it might be some other notable body parts that halt all progress.

Fresh cloths were donned in anticipation. I was going somewhere no matter what. Funny about teeth, money plays second fiddle.

She rang! 3.30 has been allocated. I got there early. I had no other task that could be focused upon.

Within 5 minutes of reclining there was euphoria. Local anaesthetics have that effect. After more than 24 hours of discomfort this was bliss. The dentist now known as Jesus of Nazareth had laid his hands upon me and I was cured. Well at least able to function normally again.

The amazing thing is that he did cure me. It was not the feared abscess just a severe gum infection where a Wisdom tooth had been removed the prior year. Some descaling, scrapping and mopping up was all that was needed. A little adjustment to the interface between the upper and lower teeth nearest the problem to minimise pressure and a droplet of Iodine.

The local anaesthetic wore off but the anticipated pain didn't return. We ate dinner, still no pain. Slept like the dead all night, still no pain.

The prescription for antibiotics and a handful of pain killers were not needed.

A miracle

Wednesday, May 21, 2014

Mushroom Growing Experiment

In the past we have tried mushroom kits with very little success. Probably not the fault of the kit maker but our lack of skill. After several tries we worked out it was cheaper to buy mushrooms as our kit trials yielded one or two mushrooms only. When we did the numbers it cost of about $100/KG.

But being inspired by a podcast on TSP  we decided to try another method. First up was to buy some mushroom samples which we did a few weeks ago. A mushroom or two were broken up and mixed with used coffee grounds and left. The Oyster mushrooms showed some white growth and today we did something with them.

First our spare baby hothouse was to become the mushroom house.


Then we set up some warmth with a lead light (fluorescent).


Some humidity was added using a small pump in a bucket of water to splash the water and increase evaporation.


Then some Lucerne hay was collected as a bed for the mushrooms.


And it was sterilised by boiling in water.


After the water was drained and the hay cooled sufficiently some of the white spored coffee grounds were added and mixed thoroughly.


And finally the hay was wrapped tightly in a plastic recycled shopping bag and some holes cut. The wad was suspended in the hot house near the light.


The small pump is playing up i.e. it is blowing the fuse on the electrical circuit. I've cleaned and sealed a hole near the lead with silicone.

The pump kept tripping the power point even after the repair. There is a slight leak of current still causing grieve. Tomorrow we will pick up a cheap new pump.

The hothouse is monitored by an inexpensive  RF temperature and humidity sensor which we used in our incubator. After sunset as the outside temperature fell the existing light could not emit enough warmth to keep the range between 21 and 27 degrees C. Our solution was a second lead light with a timer attached which comes on after dark. We monitored the temperature manually and found that if we turned on the second light after 8 pm and turns it off at 8am we achieved the desired result.

Now it is just a matter of waiting. We don't expect instant success. This is just the first of a series of trials as we learn more about mushroom growing.

Tuesday, May 20, 2014

Making Camembert and Preserving Eggplant while waiting for the Camembert

Camembert is a pretty simple chees to make especially after you have done it a few times. Practice makes it simpler.

Today I used Cheeselinks Type B culture as opposed to Type A. Only because we had plenty in stock in the freezer. For some time I've used two white mould cultures which seem to ensure 100% success and a good end result.  They are Penicilium Candidum and Geotrichum Candidum

Our home made forms
Cake knife for cutting the curd

Filling the forms with a small sieve

Job done, will turn these a few times

Some of our forms a pretty tall. This is just so it takes up less space on the kitchen sink while draining. In the morning the taller cheeses will be sliced into two or more smaller cylinders before brining.

The time in the kitchen making cheese isn't fully occupied and Jean had pointed out that a miserable little Eggplant in the garden had produced a substantial crop of fruit. More than we could consume before over ripening.

Preserving the Italian Way by Pietro Demarco and Arnold Bonnet has been one of best finds in the preserving book world. Very simple and healthy methods without excessive salts, sugars or over cooking. And flavoursome.


Red wine Vinegar

We used a recipe we had tried before and made three small jars which will be excellent ether as adjuncts to some cheese or as topping to a Winter pizza.

There was no white wine vinegar about and I used Red Wine Vinegar instead. One of the by products of wine making is there are always some failures to turn into vinegar.