Search This Blog

Showing posts with label Honey. Show all posts

Sunday, January 12, 2014

Creamed Honey and Seed Saving

Having extracted the honey yesterday the next step was to cream it. Such a surplus means it will be ages before we get through it or give enough away and rather than let it crystallise with age we crystallise it ourselves but into fine crystals that taste terrific. We kept one jar of the previous creamed honey as the seeding material.

A few small jars of natural honey is bottled for gifts and as a comparison to the creamed product. The rest is mixed with the contents of the seed material jar for an hour on the pedestal drill with a squirrel mixer and then bottled predominately into small jam jars kept from when we ate jam.
 
Natural honey kept as samples

We don't eat jam any more preferring to have the fruit and fibre fresh or if desperate for a sweet flavouring either honey or dextrose (in moderation).

The previous batch of creamed honey now out of the fridge

By the time the mixing and filling and cleaning is completed another half day went by.
 
Creamed on the left and natural on the right

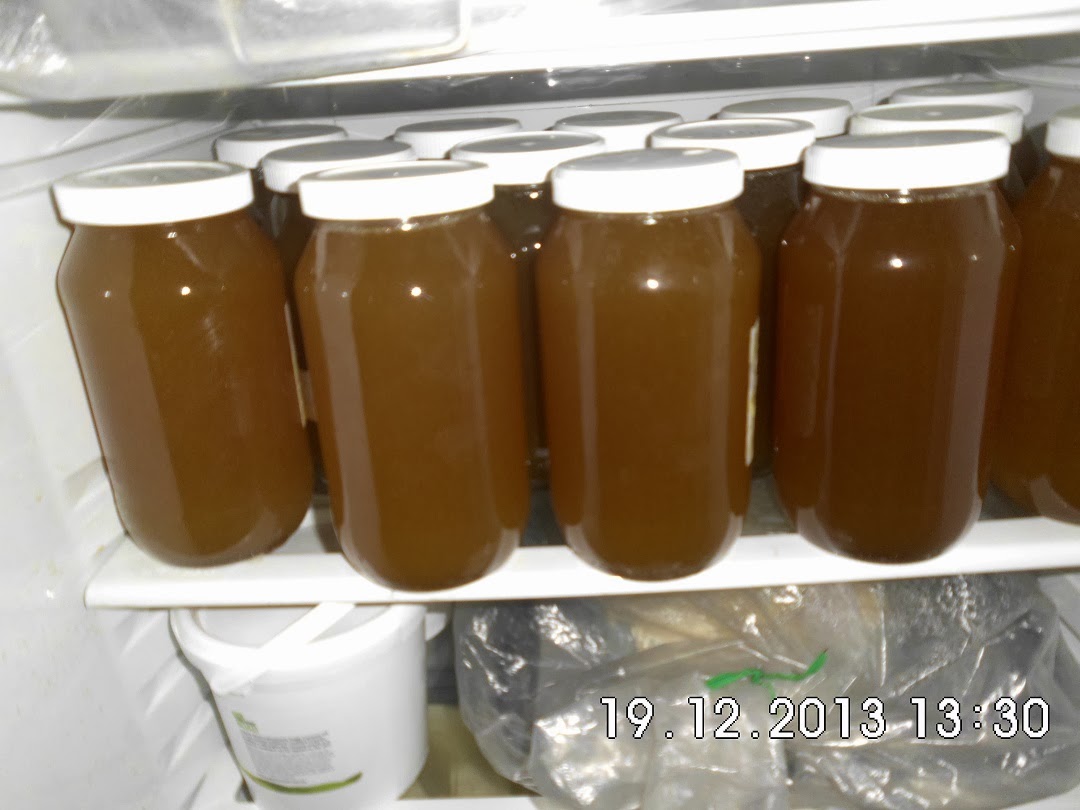
This time rather than use the cheese fridge to keep the honey cool while the crystals form we activated the bar fridge someone gave us that has an adjustable thermostat allowing us to keep the honey at 14 C for two weeks.
 
In the refrigerator for setting
 

While I was fiddling around with honey Jean got stuck into seed saving. Samples of various tomatoes we grow have been soaking for a few days and now she washed and sieved and lay the seeds out onto paper to dry.
 
 
One batch of seeds drying with the oyster opening gear in front

The rest of the seeds drying with a sprouting carrot top and some Avocado seeds
 
We also went through our tomato planting plan for next year over morning tea. Too many varieties are being grown. Some were eliminated on taste and others because they didn't do well. Usually we give them a couple of attempts before dropping them but today we were having an aggressive clean out. And still next July when we look at the issue again we may add some back or come across yet another one to try.


Saturday, January 11, 2014

Too much honey

We robbed the hive again. Things were getting a bit crowded in the hive and they were part way through capping the last two frames. The process of robbing is quite quick.

The slowest part is getting the smoker working just right. In the end it received  good clean out and some different burning material. In the past the easiest material has been hessian. Old hessian bags that were frayed and useless for anything else. They burnt slowly and no problems were experienced. Then of late it would stop smoking just at the critical moment. As it turns out it was just one of the bags which for some reason had different properties. Going onto another bag solved the problem.

The fast method for me (with one hive) is a wheel barrow with some newspaper on the bottom and an empty hive box in the barrow. Calm everyone down with a little smoke and let them get preoccupied with taking aboard some honey in case the hive needs to be abandoned. They are very quiet girls anyway so there isn't much fuss.

Out with each frame and a quick couple of shakes in front of the hive to fling the bulk off the residents onto the ground. Then with the soft long bristled bee brush the last few come off and the frame goes into the box in the barrow. Repeat seven more times and then back to the cave. Surprisingly very few bees stay with me. At the cave each frame is inspected and any last bees brushed off before the frame is transferred into a plastic container which is then relocated into the cave.

A reasonable haul

A close up
The capping knives in hot water

The honey extracted and being filtered a second time via a fine mesh

The mess to be cleaned

Removing the caps is getting easier - practice makes perfect. It all goes well  although at one point the plug in the extractor popped out and some honey flowed onto the floor. But not too serious an amount and easily cleaned away. The yield is less than last time but more than we want. The clean up starts. First putting the stickies back into the hive (gently). The four that went in an hour ago are already looking transformed. In go the last four and the girls have some housekeeping to do and more space.

This is a brood frame that was moved into the honey super hence the brown stain. The wax ix stained but not the now extracted honey

An extracted frame which has not served in the brood chamber

Our clean up starts. The extractor fits (just) into the largest sink we could find. This is in our cave. It is a recycled laundry tub. The clean up is really just hot water to melt the honey and any wax bits. The drain pipe goes into the Orchard to feed some happy trees. Then the comb knives and the knife holder. Then all the work surfaces and any empty used containers. This is the golden rule. Cleaning takes more time than anything else.

The capping's after draining
The capping's are melted down with some water. A process repeated a couple of times as the molten material is filtered to get out the gross material and honey until finally a nice plug of clean wax results.

Tomorrow the next step starts. Making creamed honey.


Nothing to do with honey extraction but we managed to knock out a sourdough brick while all else was in progress


Thursday, December 19, 2013

Creamed Honey, Roasted Peanuts

This morning the last four frames went back into the hive. The bees had already cleaned and tidied the four that went back yesterday.

Last year a batch of honey we harvested creamed naturally into a really finely textured grain and was delicious. Honey will always tend to crystallise over time unless kept warm. Usually the crystals are coarse and don't have that silky mouth texture. By seeding the fresh honey with the fine crystallised honey and mixing well you can initiate the process. Fresh honey will duplicate whatever crystals are first encountered. If they are really fine crystals it is called creamed honey.

The creaming process is pretty simple. Each of the two stainless steel buckets were about three quarters full and half a jar of starter material was added. The starter material is just creamed honey from the previous batch which had been set aside.

Each bucket was taken down to the workshop and mounted on the drill press. A Squirrel mixer is used to mix the the starter material gently with the freshly harvested honey. Some people aerate the honey but this eventually escapes leaving a prominent gap in the bottled jar and a thin scummed surface. Neither attractive or true creamed honey.

Our squirrel mixer was the smallest model available and made of plastic. The larger models are made of metal. It stirs the honey in a way that doesn't incorporate air and pulls the honey from the bottom and top of the bucket, pushing it out through the sides. Thirty minutes is plenty of time to ensure a thorough mixing. We use a pedestal drill press on a very slow setting but a good hand drill will work as well.

The squirrel mixer

A plastic lid is mounted between the mixer and the drill press to keep out any fallout


The drill press will be unattended during the 30 minutes of mixing. Just so there are no accidents some blocks of wood are clamped around the bucket.

There was one final filter through a finer stainless sieve. Just to remove any stings or other debris. The honey was then bottled in one kilogram honey jars we had accumulated from before we had our own hive. The jars are then stored in the cheese fridge. The ideal temperature for crystallising honey is 14 C. Our cheese fridge fluctuates between 9 and 14. It takes about two weeks for the crystals to form. Its easy to see when this is completed as the honey will have clouded. Once complete the honey will stay that way unless it is heated but once it cools it returns to the same state of crystallisation.
 
Final filtering

Nineteen and a half kilograms into the cheese fridge
 
While waiting for the stirring to complete all the capping's were melted in water and poured into moulds. This will need to be done a second time to remove all the contaminants and then set aside to use as cheese coating.
 
The melted capping's cooling
 
As a Christmas treat we roasted some raw blanched peanuts in the oven at 200 C until they were nicely brown and as soon as we took them out poured and stirred in a salt and water mix. Only a table spoon of water is required and a teaspoon or two of salt. The heat evaporates the water and the salt adheres to the nuts. No oils involved.
 
Freshly roasted and salted peanuts
 

Wednesday, December 18, 2013

Getting back to normal, Bees, Halloumi

It was well after midday before we started getting back to normal at HHF. The previous day our northern friends returned and the four of us attended the funeral of a mutual friend. As previously mentioned housework is not the greatest priority for us. The short notice resulted in a 4am start  to prepare the house for visitors and ensure their overnight stay would be comfortable. A meal was partially pre-prepared as we assumed it would be a long day and we may not feel like cooking on such a sad occasion. It was amazing how much housework we completed in 4 hours.

The large church was packed as you would expect for a person who came from a big family and then there were the many friends and of course all teachers touch the lives of such a large number of students. Always sad to see the end of a life early and suddenly.

The four of us retreated to HHF and ate, drank and talked until late into the evening. Then spent the morning breakfasting and talking. We hadn't seen each other for more than 5 years and there was a lot of ground to cover. A warm farewell at 1pm and we went back to normality.

Normality involved robbing the hive. The girls had excelled themselves and not only filled every frame but were scratching around for space and started building comb in any free corner. Originally the plan was to take only 6 frames but the accelerated activity resulted in removing 8 frames. Two full frames left behind just in case. I processed 4 frames immediately and returned them to the hive so that the girls could start the clean up process.
 
Overloaded frames

The rarely used spinner needed a good clean


A full frame

We don't over filter. Just a simple sieve to keep out the worst of the chunks
Both of us were working in the cave. Jean churning cultured cream into butter. We thought we understood what causes the cream to turn. But not so. This batch took forever. Possibly because we didn't have time to churn earlier the cultured cream had been placed in the fridge after 24 hours for an extra couple of days before we finally had time to attend to it. 

In the kitchen there was a batch of haloumi being formed on the stove. After renneting, cutting and stirring the curds were draining on the sink and the whey was slowly coming to temperature for the final step. I ducked across the river to setup the irrigation for an overnight run leaving Jean to finish off.
 
Draining haloumi curds

And the finished product cooling before brining
 
After returning from setting up irrigation the last 4 frames were processed and being late the stickies were left for a morning insertion. The harvest was good with two stainless steel buckets well filled.
 
The capping's draining

The comb after spinning


 The frames after spinning

Two buckets well filled


Say 7 litres per bucket?
 
And then finally sit down, glass of HHF 2013 sparkling Semillon accompanied by smoked salmon trimmings and enjoy a really good DVD “The Help”. A wonderful tearful film.

Tuesday, June 25, 2013

Creamed Honey


Just opened a jar of our creamed honey. We had robbed the hive just before the hive went into decline. Only took a few frames and left the bulk for them. It yielded 6 KG which we creamed despite being told it can't be done in Summer. Creamed honey is nothing more than crystallised honey where the crystals are really fine. This provides a lovely mouth feel. We had a couple of jars from another robbing which had naturally crystallised with very fine crystals and kept this aside to use as seed material.

The process is simple, add some seed material to your batch of freshly robbed honey. I have heard you can use previously crystallised honey with large crystals by heating it gently until it is liquid again. I tried this but had no success. But that could be just me. The recommendation is 1 part seed to 10 parts honey. I have used less with success.

The stirring is the critical part. Not too fast otherwise air is incorporated and you get foaming. Just a gentle central vortex. We use a Squirrel mixer. These are available on the web in various sizes, we bought the smallest. Our drill press was set at a slow speed and we stirred for 30 minutes with 6 KG of honey. The beauty of using a drill press is that it can be setup and run without having to stand in attendance. A hand drill will work but it is difficult to maintain a slow speed. One experiment we tried was using different paddles in various types of electric mixers. The problem with all these was too much speed. They also have a tendency to overheat because of the viscosity of the honey. You may need longer for bigger batches or a bigger Squirrel Mixer.

The honey was then bottled in 1 KG jars and stored in a refrigerator at 7-18 C. The ideal temperature being 14 degrees C. Ours stayed in the refrigerator for 2 weeks. Once it had crystallised it stayed that way.


References:


Creamed honey's perfect caramel colour

The Australian Supplier of the Squirrel Mixer


The Magical Squirrel Mixer