Search This Blog

Thursday, June 6, 2013

Sweet Potato


Finally, a very pleasing result in the Sweet Potato bed this year. Previously the prolific white Sweet Potato had taken over the bed and shaded out the Orange variety after two years the last of the white has been weeded out and the Orange replanted each time. The Orange has thrived and the crop is very healthy. Getting rid of the unwanted variety was achieved through deep digging over several times until all pieces were removed down to the smallest segment. The thriving replacement crop is thanks to a very heavy application of last years compost made in the NZ Compost Bin. Once the crop is fully harvested the bed will be dug over again to ensure no white stragglers remain and another heavy application of compost incorporated with the left over Orange segments. Celebrated with a mashed Sweet Potato and Pumpkin (with a little Fish Sauce to enhance the flavour). Sweet potato varieties with dark orange flesh have more beta carotene than those with light-coloured flesh

Orange Sweet Potato
 

Saturday, June 1, 2013

Chocolate - Home Made


All those lovely chocolates in the stores, Australian, Swiss, Belgian, Austrian etc. But all of them made with a list of ingredients that you would prefer to not put in your body. Well you can have your chocolate and eat it by making your own. It's easy and it's quick. Fill a saucepan with warm water and sit a bowl (not plastic) in the saucepan so the base of the bowl is in contact with the water. Keep the saucepan warming on the stove top. You need the water warm but not too hot.

Ingredients required: Coconut Oil, Cocoa Powder, Dextrose.

Optional Ingredients: Nuts of your liking, Shredded Coconut, Vanilla pod or essence.

Scoop in 5 measures (spoons, cups whatever) of Coconut oil into the warming bowl and allow it to melt. You can melt it in warm water before hand.

Put in 5 measures of Dextrose. The dextrose will need some time and stirring to dissolve. You can use more less Dextrose depending on your sweet tooth.

When you think the Dextrose has dissolved add 5 measures of Cocoa powder. More if you want a more intense chocolate flavour. Stir without heating too much so the mixture becomes smooth. Taste it to see if you want more Dextrose or more Cocoa.

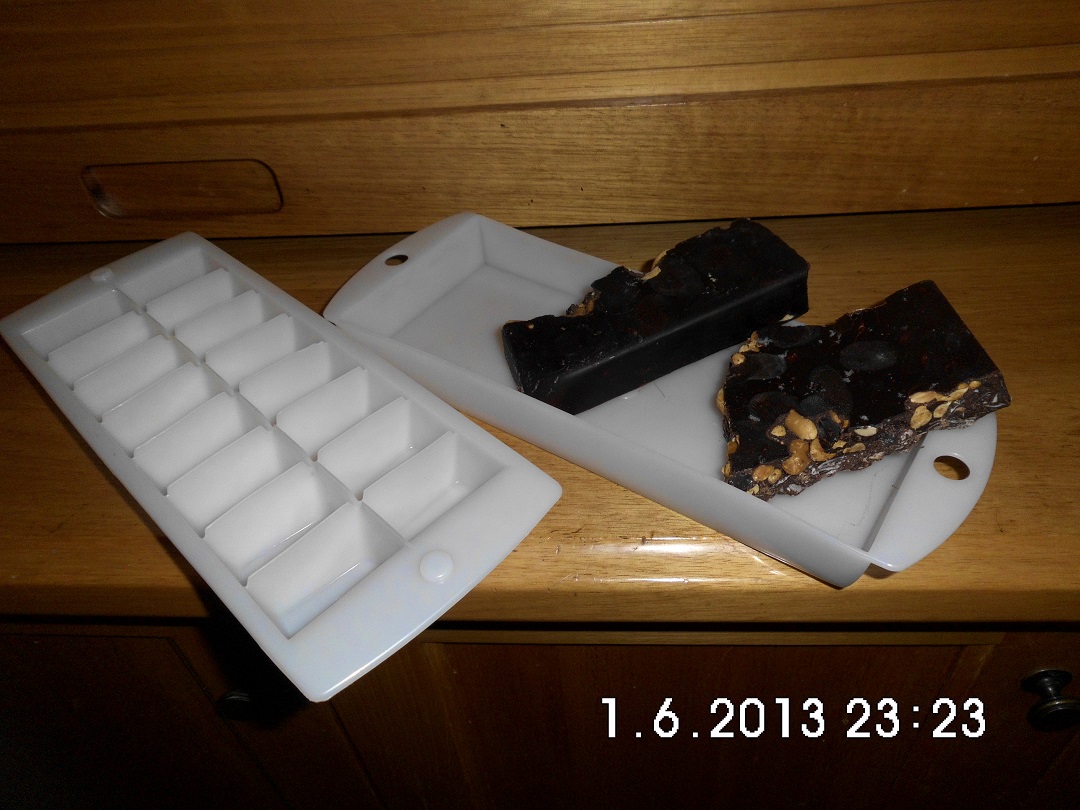
We use two different moulds. I prefer a flat based plastic container which allows me to break up the chocolate into rough pieces but I also use ice cube trays for even cubes. Let it set in the refrigerator until firm and then eat. Its keeps well in an airtight container in the refrigerator.

My favourite optional ingredient is roasted unsalted peanuts, just a thin layer in the base of the mould with the liquid chocolate poured over it. Texture wise I've found a thin layer of chocolate is best i.e. no more that 10 mm thick for the best mouth feel. We buy raw blanched peanuts and roast them in the oven. Shredded coconut raw or toasted in a frying pan is best added to the chocolate mix before pouring into moulds. I use it along with the nuts sometimes. Once you have the flavour right you can put in all sorts of additional goodies such as Vanilla Essence or pod scrapings, dried fruit, chilli, salt etc – entirely up to you.

There are different brands of coconut oil some are very expensive and some are very cheap. I have only come across one that was putrid and even the chooks wouldn't touch it when I threw it out. Some supermarkets carry Coconut oil as do most health food shops as well as Indian and Asian food stores. Try a few until you find one you like as they do taste a little different because of the processing.
Cocoa powder (use Dutch Processed) varies dramatically. Some only produce a light chocolate flavour and colour and others a much more intense colour and flavour. Again supermarkets and health food stores carry them.
Ingredients - Coconut Oil, Cocoa Powder, Dextrose

Shredded Coconut being toasted
Trays prepared for chocolate addition
Bain Marie using a saucepan and bowl

Just poured


The finished Product

Thursday, May 30, 2013

Compost Bin


Compost making again. At this time of year we commence pruning around the property, various shrubs that have grown excessively and the fruit trees. We have a Budlea in particular that is planted near the carport. In the last month it has contributed to three NZ composts (see photos). These bins are 1.2 M cubed filled with multiple layers of mulched green pruning s, dry matter such as mulch hay, a tiny layer of soil, fire place sweepings, a little manure or blood and bone and lime. All with lots of water. Having just turned the first compost into the next bin after 6 weeks of fermenting, this week we built another compost in the now empty bin. Every morning you can see the steam rising out of the central air hole as the bin heats to between 50 and 70 degrees C. All this after 12 weeks in total will then be used in the vegetable garden.


Front panels slide into place as the compost is built
 

Wednesday, May 29, 2013

Dragon Fruit

Planted this Dragon Fruit about a year ago and have already had three pieces of fruit and another is on the way. The fruit is roughly spherical and about 100 mm in diameter. The texture reminds me of Kiwi Fruit but the flavour and colour is different. Lots of black seeds (all small), sweet flavour - love it. Very easy to grow. This came from a cutting that was stuck in a pot until it took root. Best planted out of the way because of the spikes, loves to grow vertically.
 
Dragon Fruit

Tuesday, May 28, 2013

Potted Artichoke

In past years we had little success with growing Artichokes with poor size and disease problems. Last year we planted seed in April/May and potted up until transplanting into 200 litre halves in July. This resulted in a great yield with just a couple of plants. So this year we are following the same routine but putting in a few extra plants. The photograph shows a survivor from last year. Not sure how it will go. One critical factor was timing. A couple of other Artichokes planted late did not grow sufficiently well to produce flowers. We will see if these carry overs will produce something in the second year or whether we need to plant freshly from seed each year for the best results. It is pleasurable to sit in front of the TV peeling away a leaf at a time, dunking it into a sauce of some type and then scraping off the soft flesh with your teeth.
 

Wine - Bottled and Labelled

Sometimes it's nice to affix a pretty label before consuming. In the cellar we use drop down tags to keep track and make it easier to spot want is wanted.,


Building up the cellar for a rainy day

Friday, May 24, 2013


Bottled most of the whites today, Muscat, Semillon, Chardonnay and Sauvignon Blanc. The first dozen of each was made into sparkling by adding fermenting yeast and sugar. 15 ml of 25 Beaume water and sugar with yeast added while it was 40 degrees C. Then 12 grams sugar then filling the bottle. Using recycled champagne bottles to make sure they handle the pressure. A nearby resident celebrates Friday night with a bottle of French champagne. Rummaging through their recycling bin once a week has resulted in a good collection of top quality bottles. The rest of each batch of wine went into Stelvin sealed bottles also collected from recycling. The screw caps can be reused several times just need to check the wadding inside has stayed intact. Not a bad days effort six dozen whites and four dozen sparkling. Should get us through the year. When opening the sparkling it just needs to treated like a home brew i.e. decant gently into glasses or another bottle and leave the sediment behind. Getting crown seals for the champagne bottles is not all that difficult as a lot of home brew places carry them.